> ## Documentation Index
> Fetch the complete documentation index at: https://docs.cosmosid.com/llms.txt
> Use this file to discover all available pages before exploring further.
# Create a cohort with Query Builder
## What is a cohort?
Building a Cohort outside the Cosmos-Hub typically requires querying metadata spreadsheets, matching that metadata to samples in the Data Table, and a lot of time-consuming data wrangling. On Cosmos-Hub 2.0, an AI agent will help you assembling the Cohort you need for an Analysis Project, without having to compose a single SQL query.
## What is the Query Builder?
The Query Builder (QB) is an AI-based chatbot that interactively guides you through composing complex metadata queries to build the Data Table used as input for your analyses.
Interacting with the QB is a hybrid experience: you can build your Cohort's metadata query either by accepting filter suggestions in the interface, or by describing what you need in natural language, which the QB interprets and translates into a formal query. As the conversation continues, you refine the query further until it captures the specific Cohort you need.
By the end of the conversation, you will have created an Analysis Project with your queried Cohort, ready for analysis in the Analysis Studio.
## Create a Cohort with the Query Builder
The Query Builder can be accessed through three different routes
 Inside the Study Dashboard, click on "+ New Analysis" to open the Query builder and start the creation of a New Analysis Project.
1. Click on "Import Data" to open the Data import dialog
2. Select 'Use Existing Workspace Data' to start building a cohort for the current Study
Typically, the Query builder will first ask *which* type of 'omics profiles (e.g: taxonomic, functional, qPCR, metabolomics) you would like to use as primary source to create a cohort. If you already know which dataset, you can use that dataset as the starting point with the Query Builder by:
Inside the Study Dashboard, click on "+ New Analysis" to open the Query builder and start the creation of a New Analysis Project.
1. Click on "Import Data" to open the Data import dialog
2. Select 'Use Existing Workspace Data' to start building a cohort for the current Study
Typically, the Query builder will first ask *which* type of 'omics profiles (e.g: taxonomic, functional, qPCR, metabolomics) you would like to use as primary source to create a cohort. If you already know which dataset, you can use that dataset as the starting point with the Query Builder by:
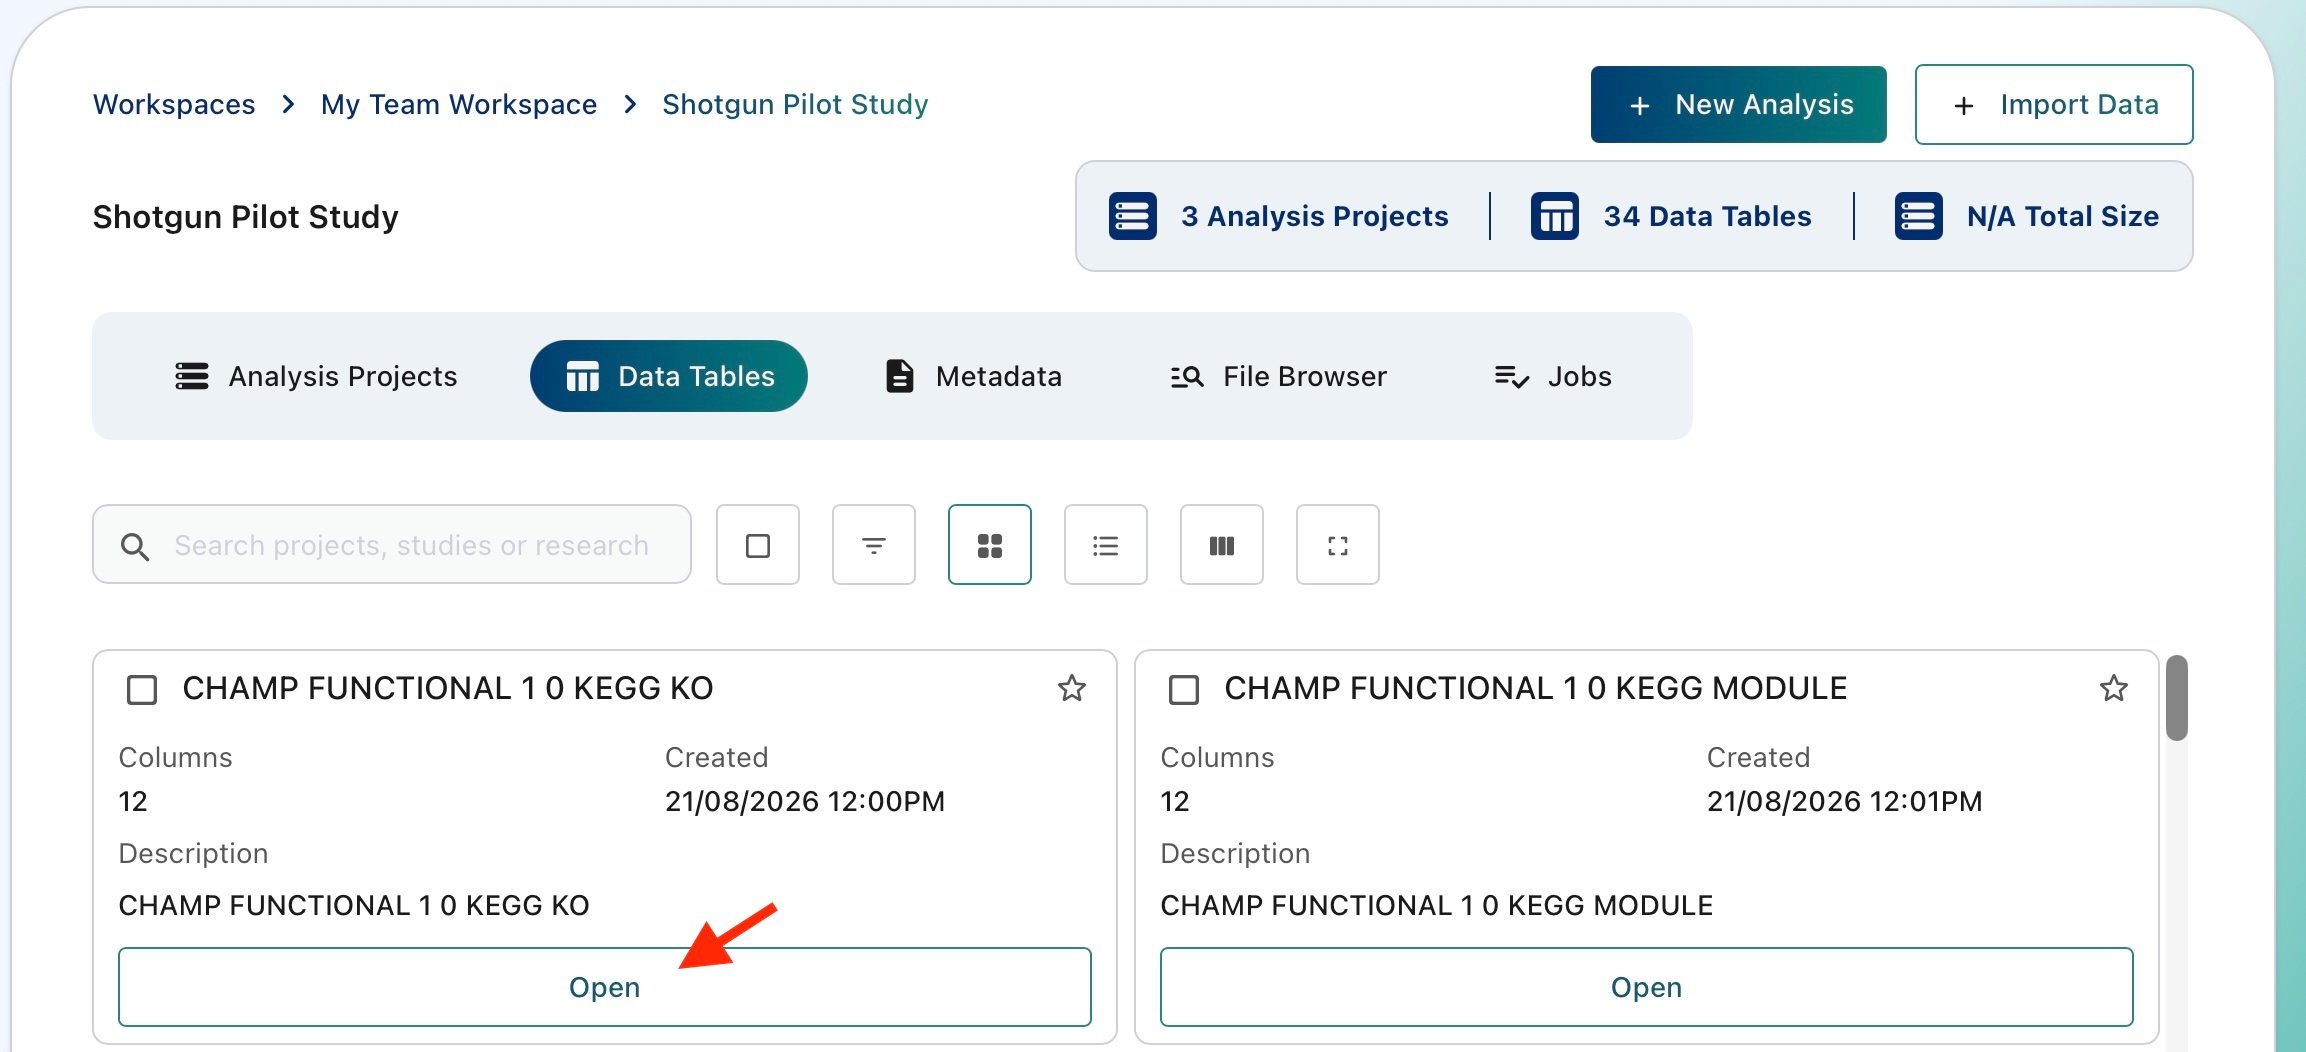
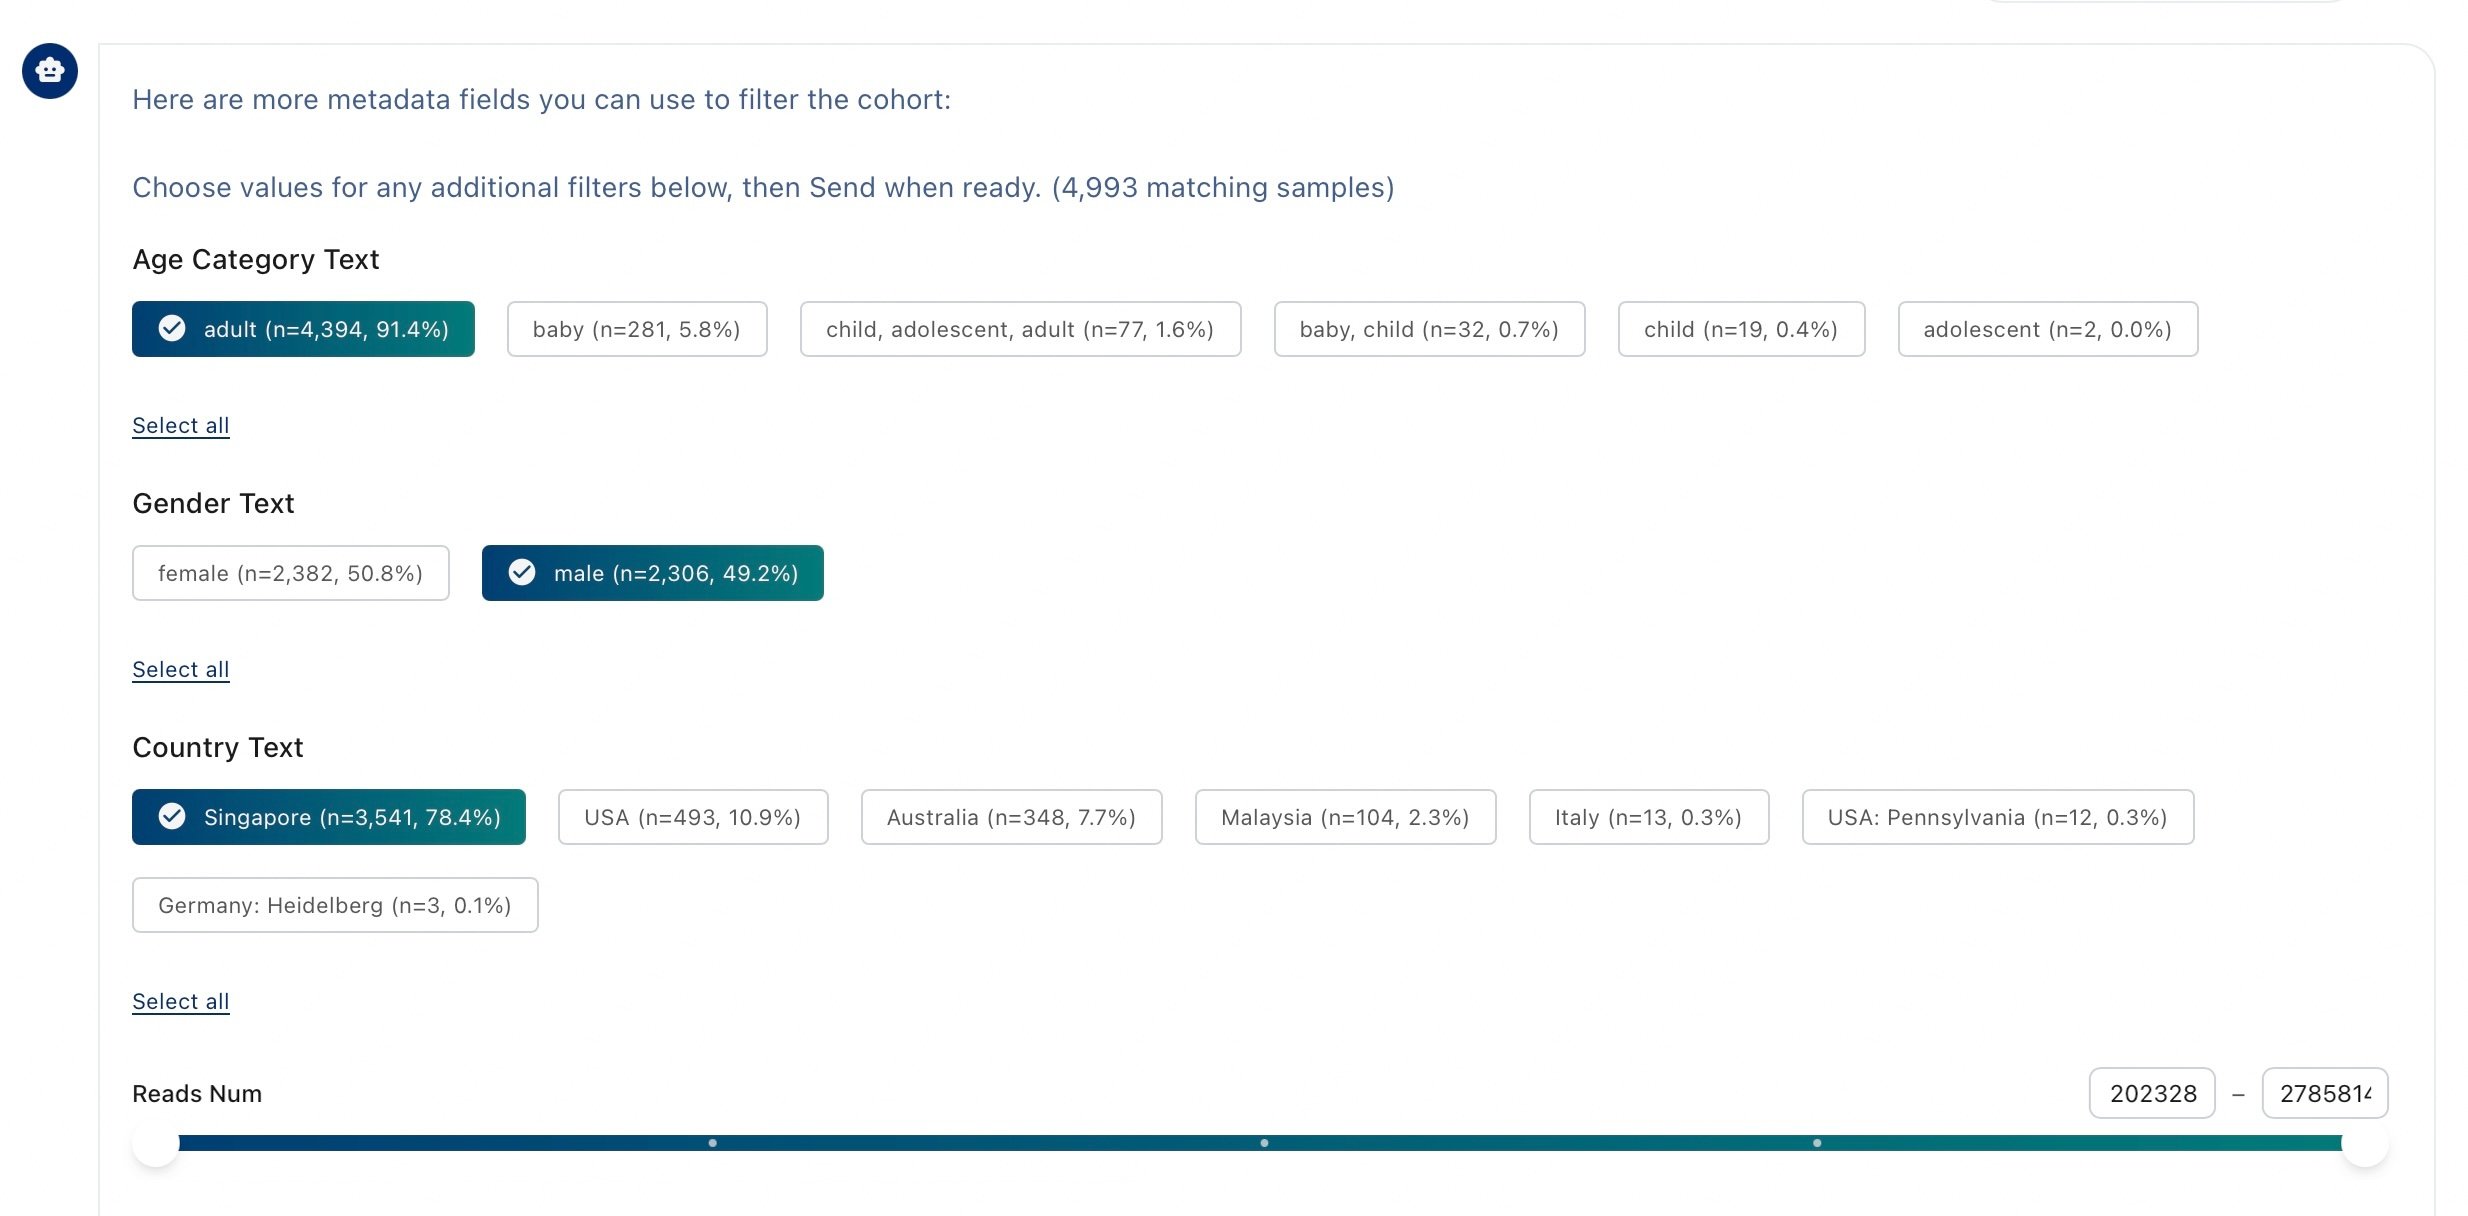
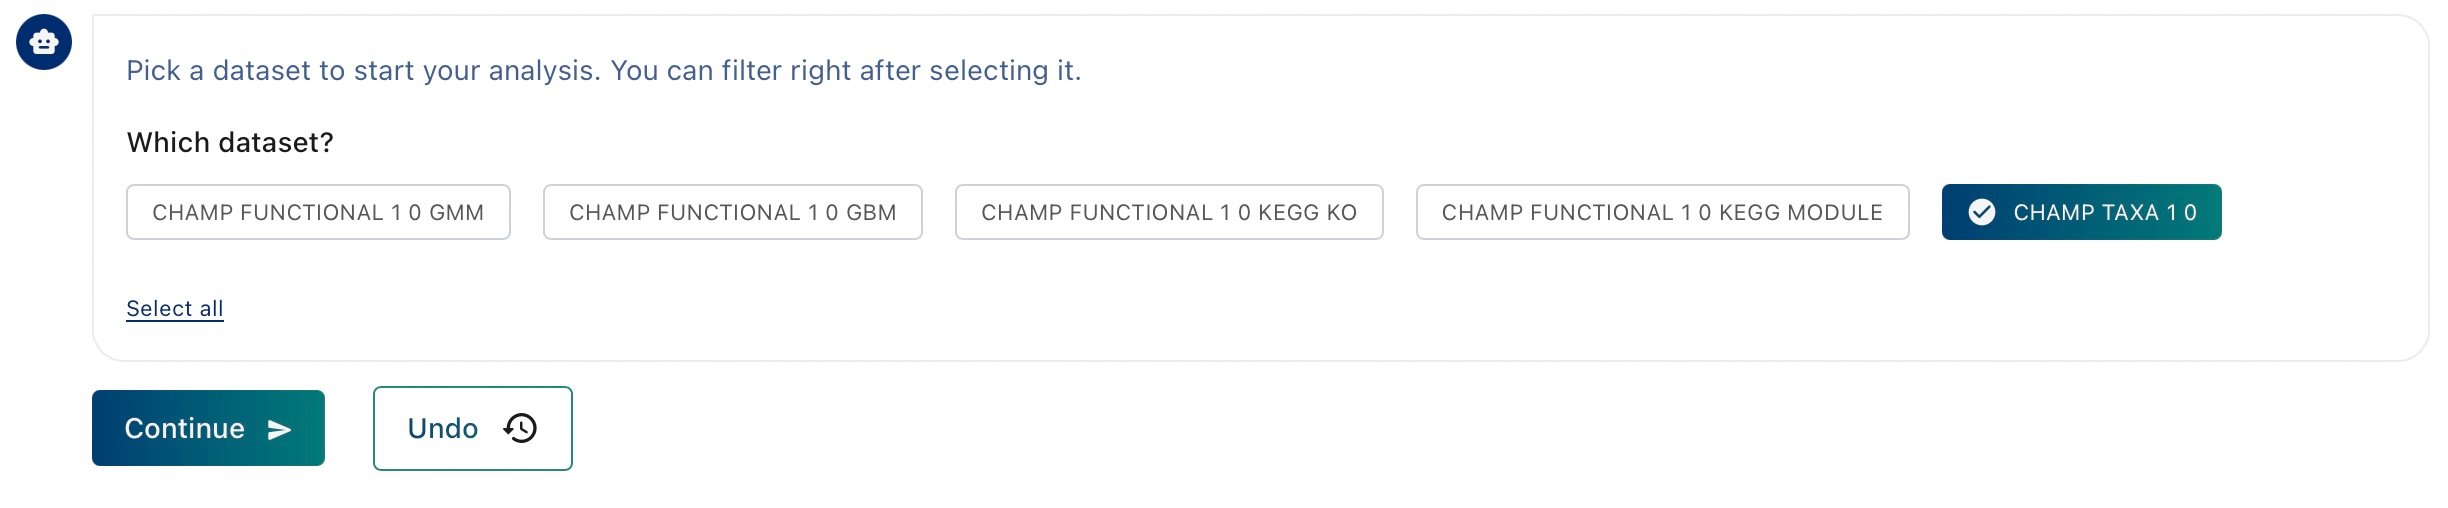 The Query Builder will start by proposing metadata filters based on the sample metadata available for the selected dataset(s):
* **Categorical Metadata**: as multiple choice options for each metadata attribute, along with the number of samples in that category, and the percentage of the dataset those samples represent.
* **Numerical Metadata**: as a slider to set the upper and lower limits defining your sample Cohort.
The Query Builder will start by proposing metadata filters based on the sample metadata available for the selected dataset(s):
* **Categorical Metadata**: as multiple choice options for each metadata attribute, along with the number of samples in that category, and the percentage of the dataset those samples represent.
* **Numerical Metadata**: as a slider to set the upper and lower limits defining your sample Cohort.
 The QB is a interactive chatbot. You can type any request written in natural language at any point of the conversation. The Query Builder is AI agent built to interpret any written request in natural language and apply the right metadata filters to build the correct query logic.. You can also request information about the dataset or the current cohort. Try few requests, such as:
* **Explore the metadata**: Ask which attributes are available and what values they contain. The Query Builder will report which metadata is available for the current sample selection.
The QB is a interactive chatbot. You can type any request written in natural language at any point of the conversation. The Query Builder is AI agent built to interpret any written request in natural language and apply the right metadata filters to build the correct query logic.. You can also request information about the dataset or the current cohort. Try few requests, such as:
* **Explore the metadata**: Ask which attributes are available and what values they contain. The Query Builder will report which metadata is available for the current sample selection.
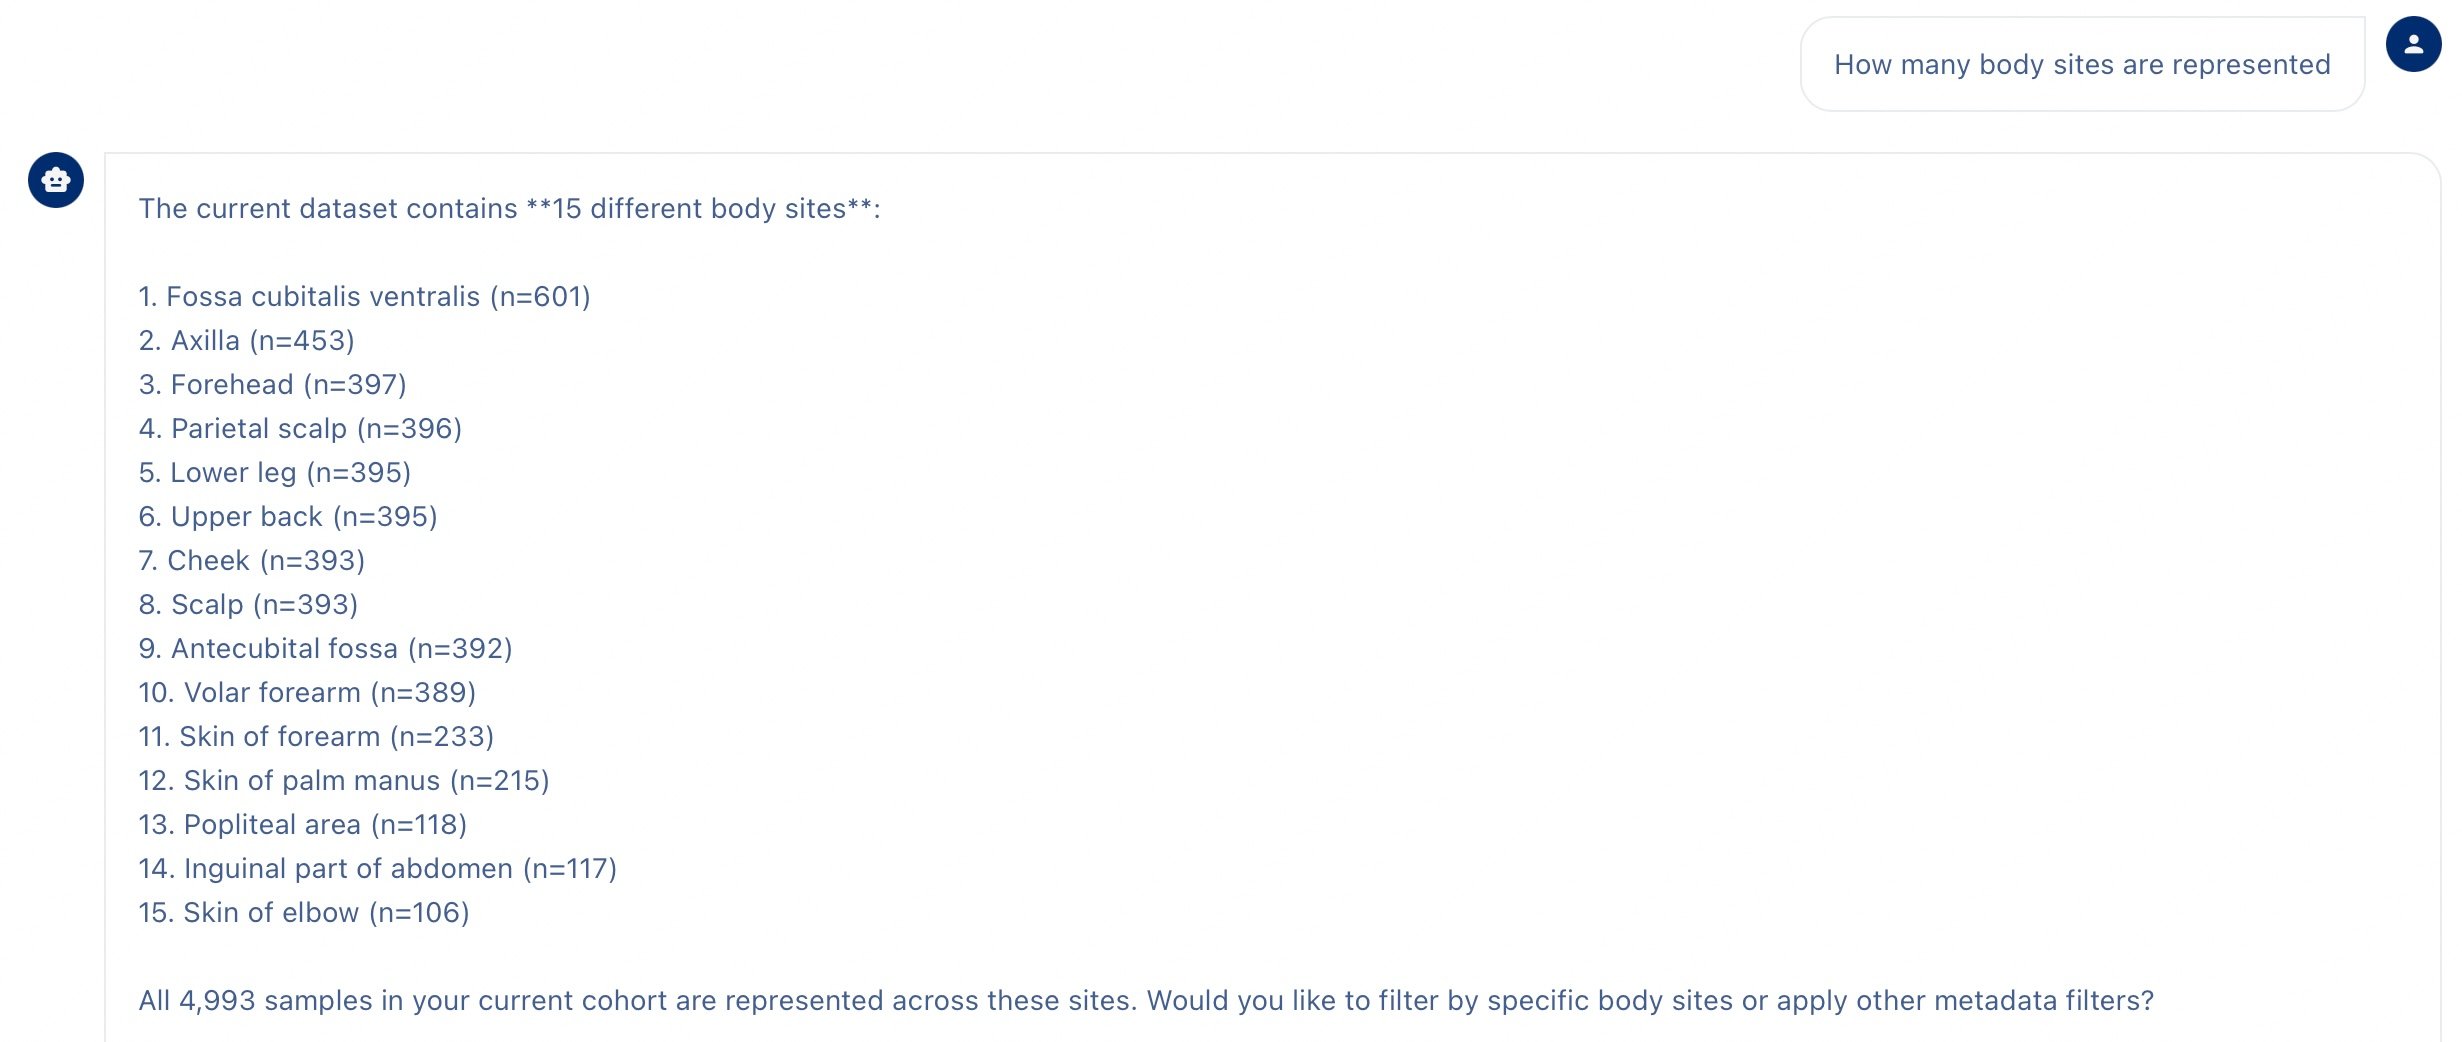 * **Ask to apply multiple filters at once**
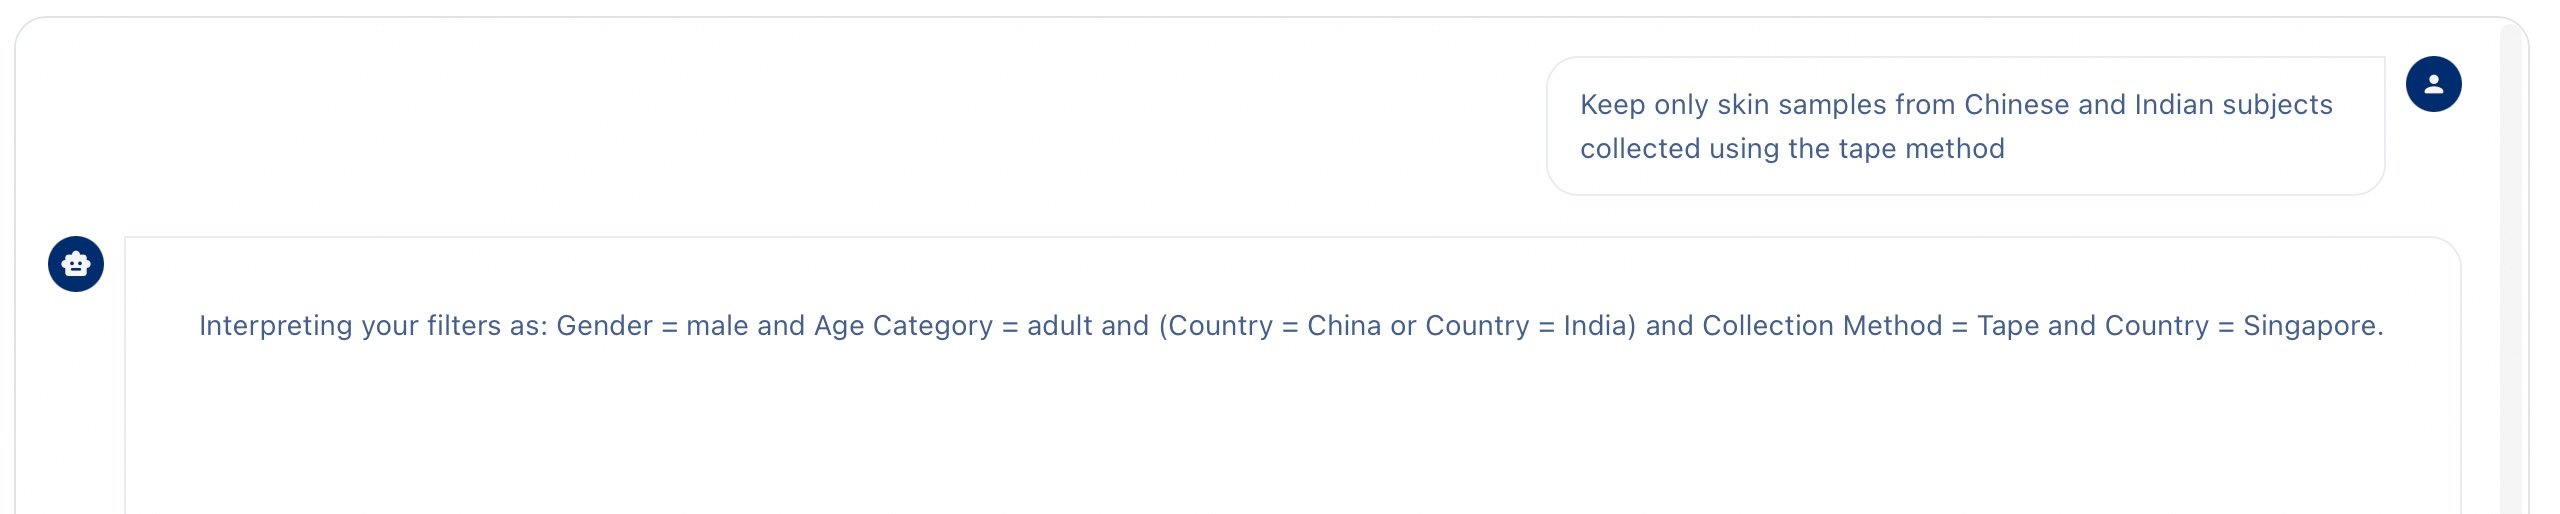 As the conversation with the QB goes on, you can keep track of which filters have been applied so far from the Active Filters panel on the right.
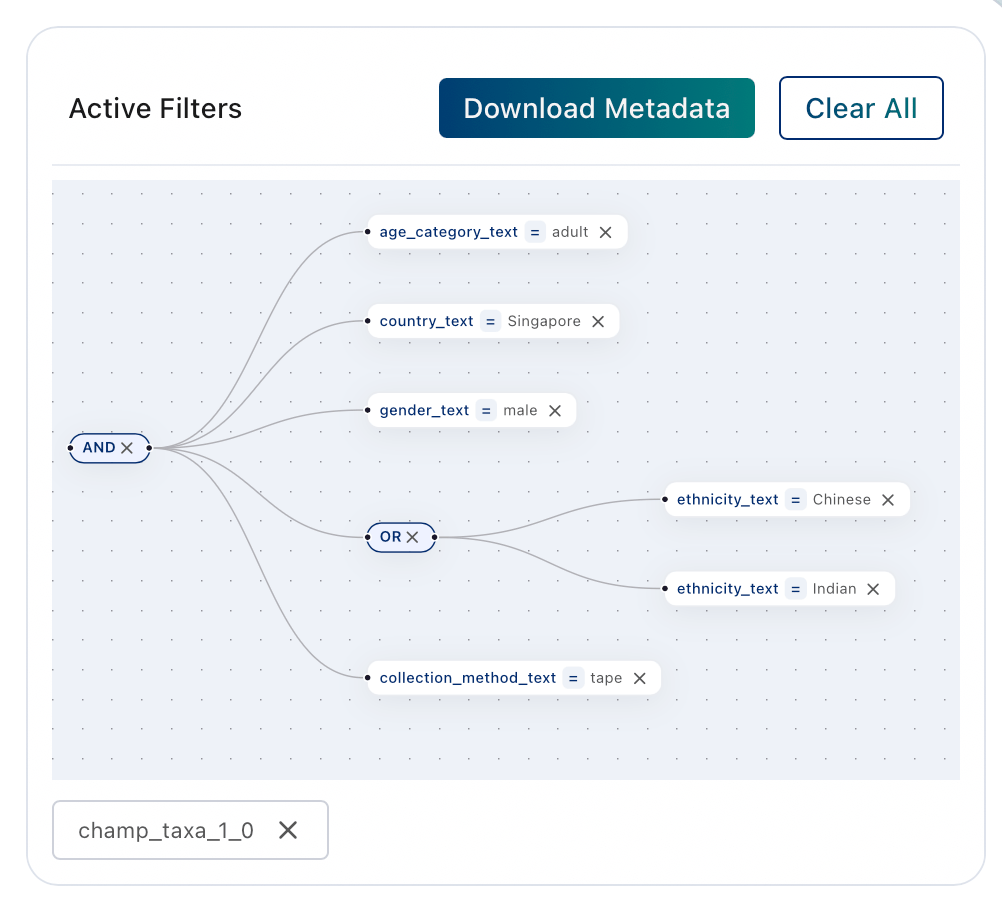
 The Query Builder asks which metadata columns to carry into the Analysis Project. These are the metadata fields that will be available in the Analysis Studio for an Analysis Project
Not selecting any column will automatically keep all the metadata columns available for the current sample query.
1. Once you're satisfied with the query built so far, you're ready to finalize the Analysis Project. Click 'Looks good - Create the Analysis'.
2. Choose a name and a write a small description (optional) for your Analysis Project.
Choose which Analyses Modules you plan to run on your cohort.
The Query Builder asks which metadata columns to carry into the Analysis Project. These are the metadata fields that will be available in the Analysis Studio for an Analysis Project
Not selecting any column will automatically keep all the metadata columns available for the current sample query.
1. Once you're satisfied with the query built so far, you're ready to finalize the Analysis Project. Click 'Looks good - Create the Analysis'.
2. Choose a name and a write a small description (optional) for your Analysis Project.
Choose which Analyses Modules you plan to run on your cohort.
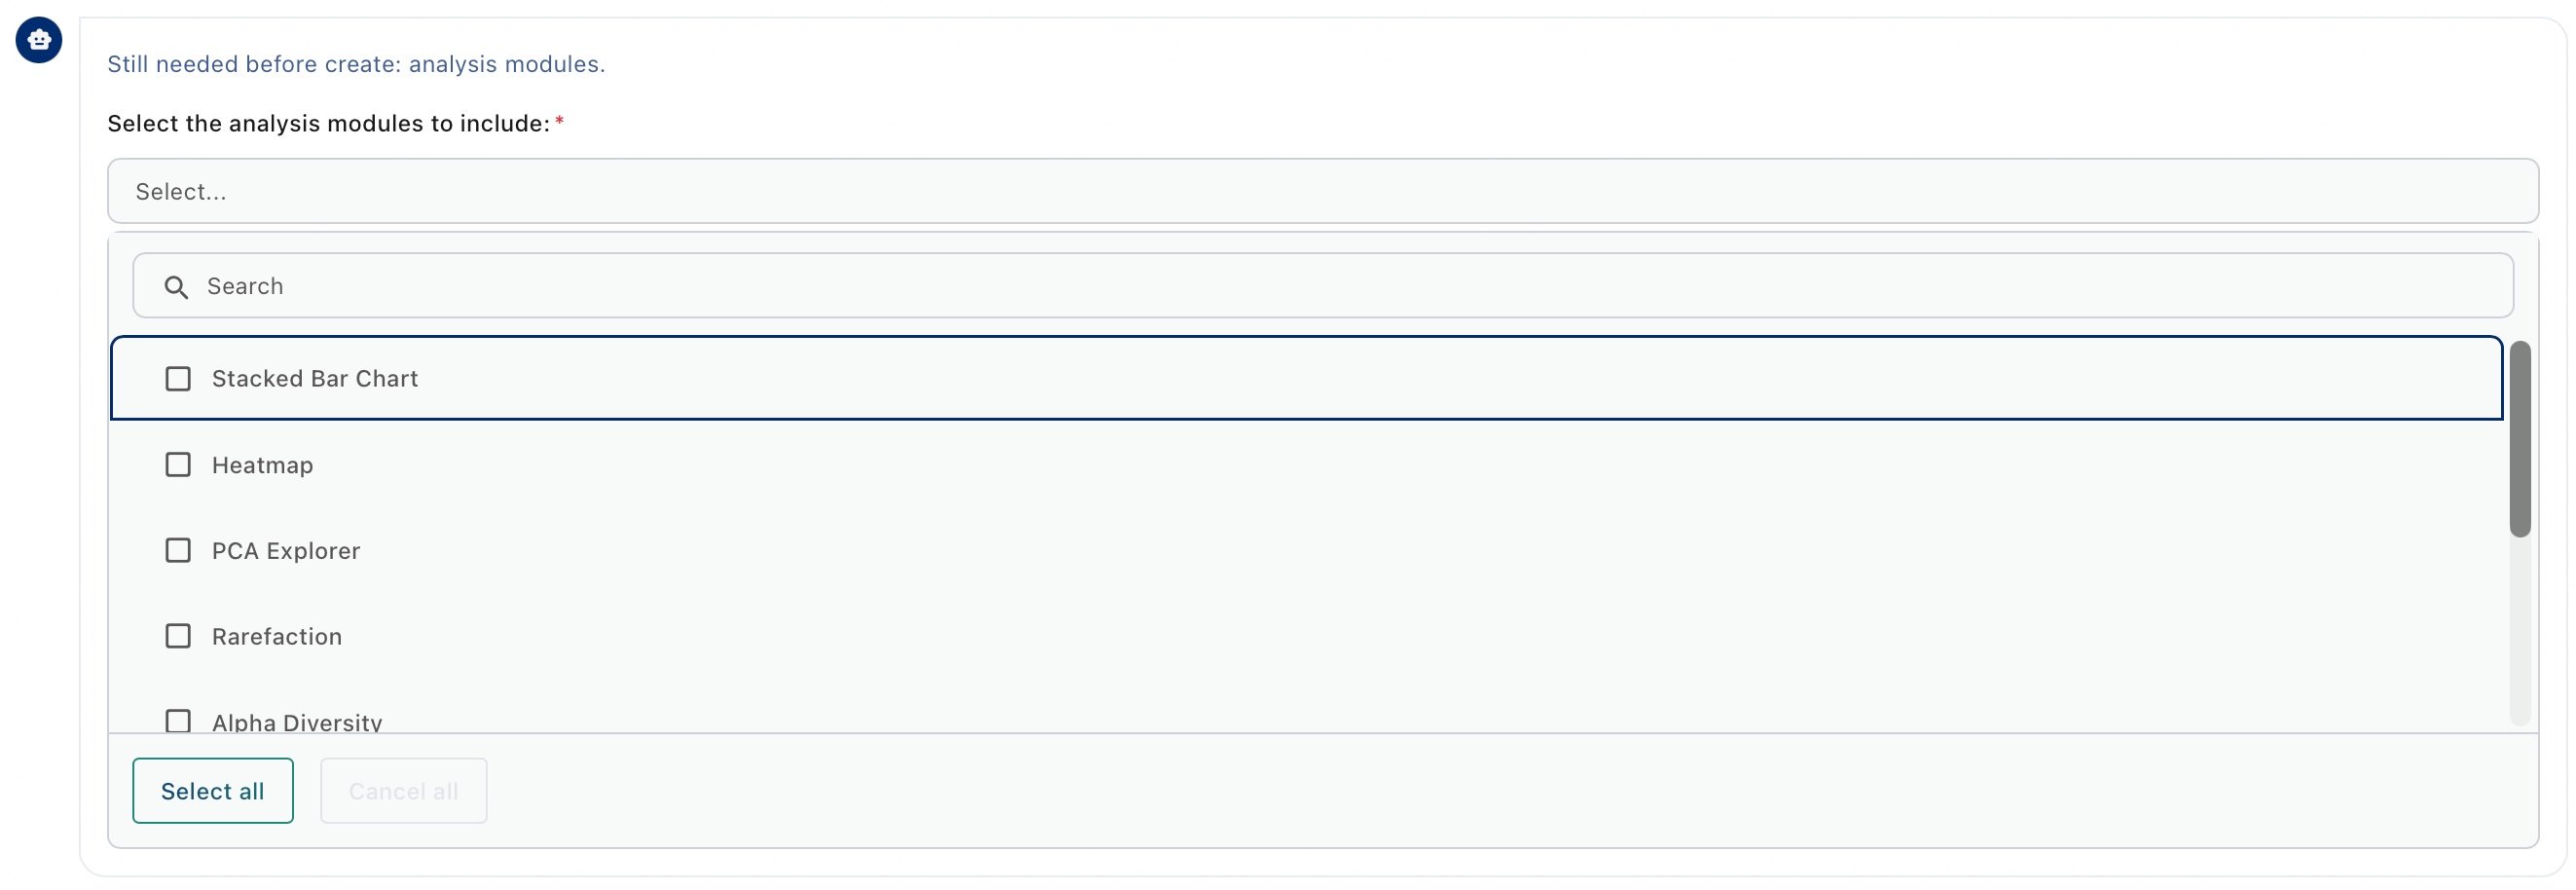 If unsure of which ones you will actually need, click on 'Select All'. This will let you use all the modules available on Cosmos-Hub when analyzing your cohort in the Analysis Studio.
The Query Builder will provide a summary of the query built so far. Click on 'Confirm and Create Analysis' to finalize creation of the Analysis Project.
If unsure of which ones you will actually need, click on 'Select All'. This will let you use all the modules available on Cosmos-Hub when analyzing your cohort in the Analysis Studio.
The Query Builder will provide a summary of the query built so far. Click on 'Confirm and Create Analysis' to finalize creation of the Analysis Project.
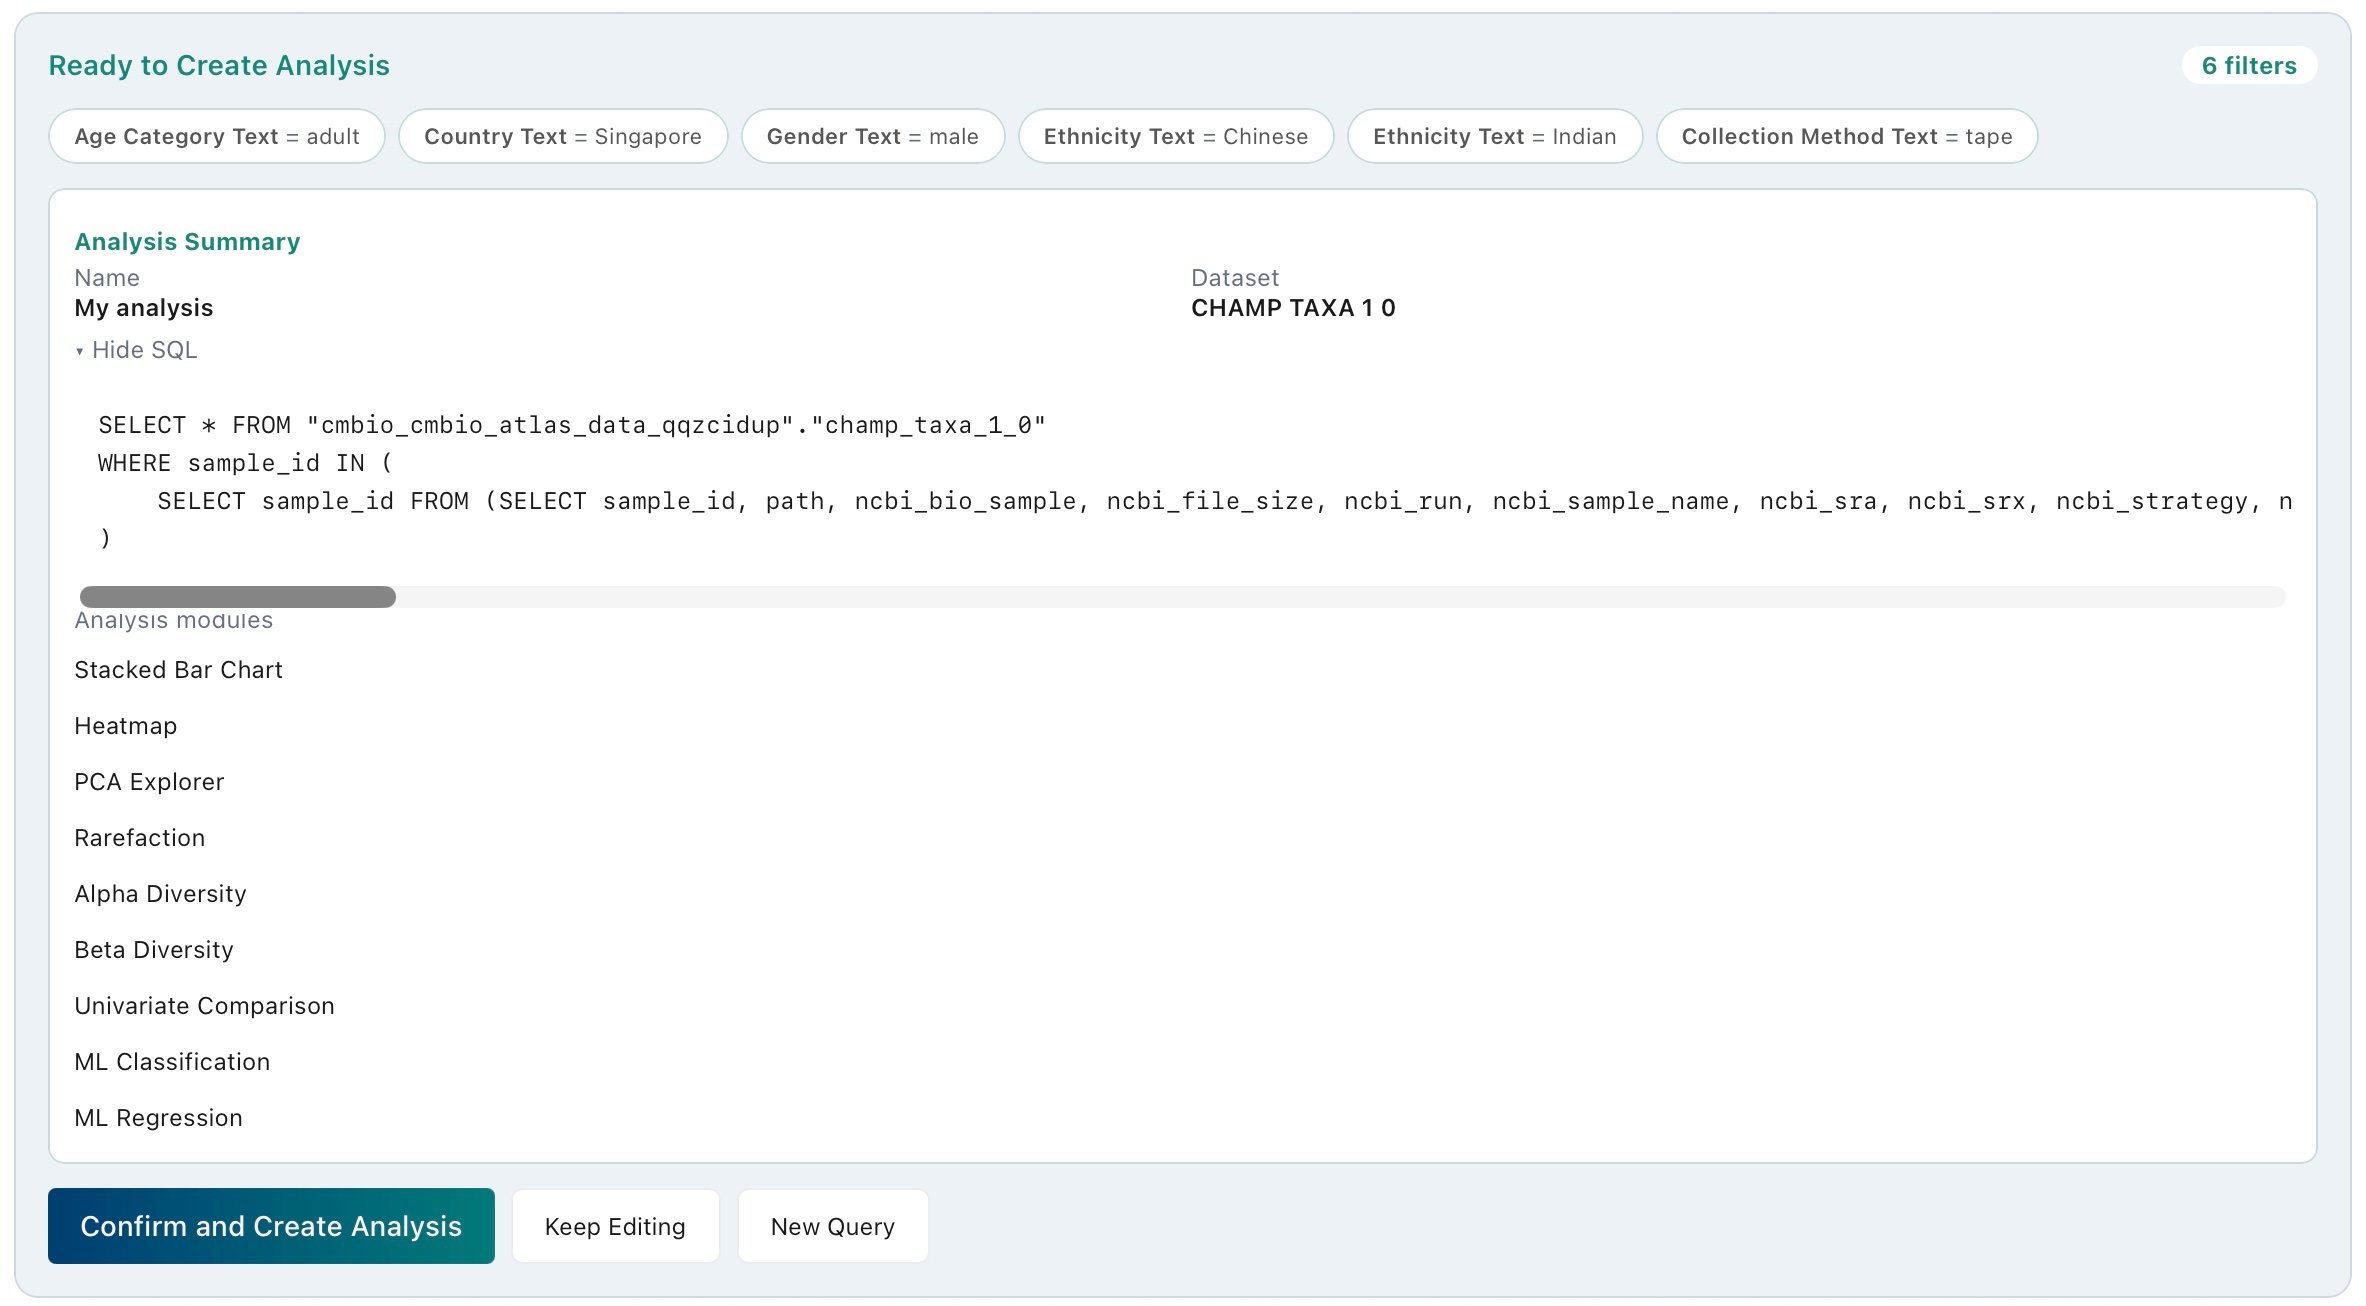 Last minute change of plans? You can adjust your query at any point using the controls at the bottom of the conversation. Continue editing, start over with a new query, or undo the most recently applied filters.
#### Jobs
You can check the status of the Analysis Project you just created from the **Jobs** tab in the Study Dashboard. This lets you monitor whether the Analysis Project was created successfully, and if it was not, review the details of the error.
Last minute change of plans? You can adjust your query at any point using the controls at the bottom of the conversation. Continue editing, start over with a new query, or undo the most recently applied filters.
#### Jobs
You can check the status of the Analysis Project you just created from the **Jobs** tab in the Study Dashboard. This lets you monitor whether the Analysis Project was created successfully, and if it was not, review the details of the error.
 ## Downloading metadata for your current cohort
At any point of the conversation, click **Download Metadata** above the Active Filters panel to inspect and export the metadata for the samples currently selected.
## Downloading metadata for your current cohort
At any point of the conversation, click **Download Metadata** above the Active Filters panel to inspect and export the metadata for the samples currently selected.
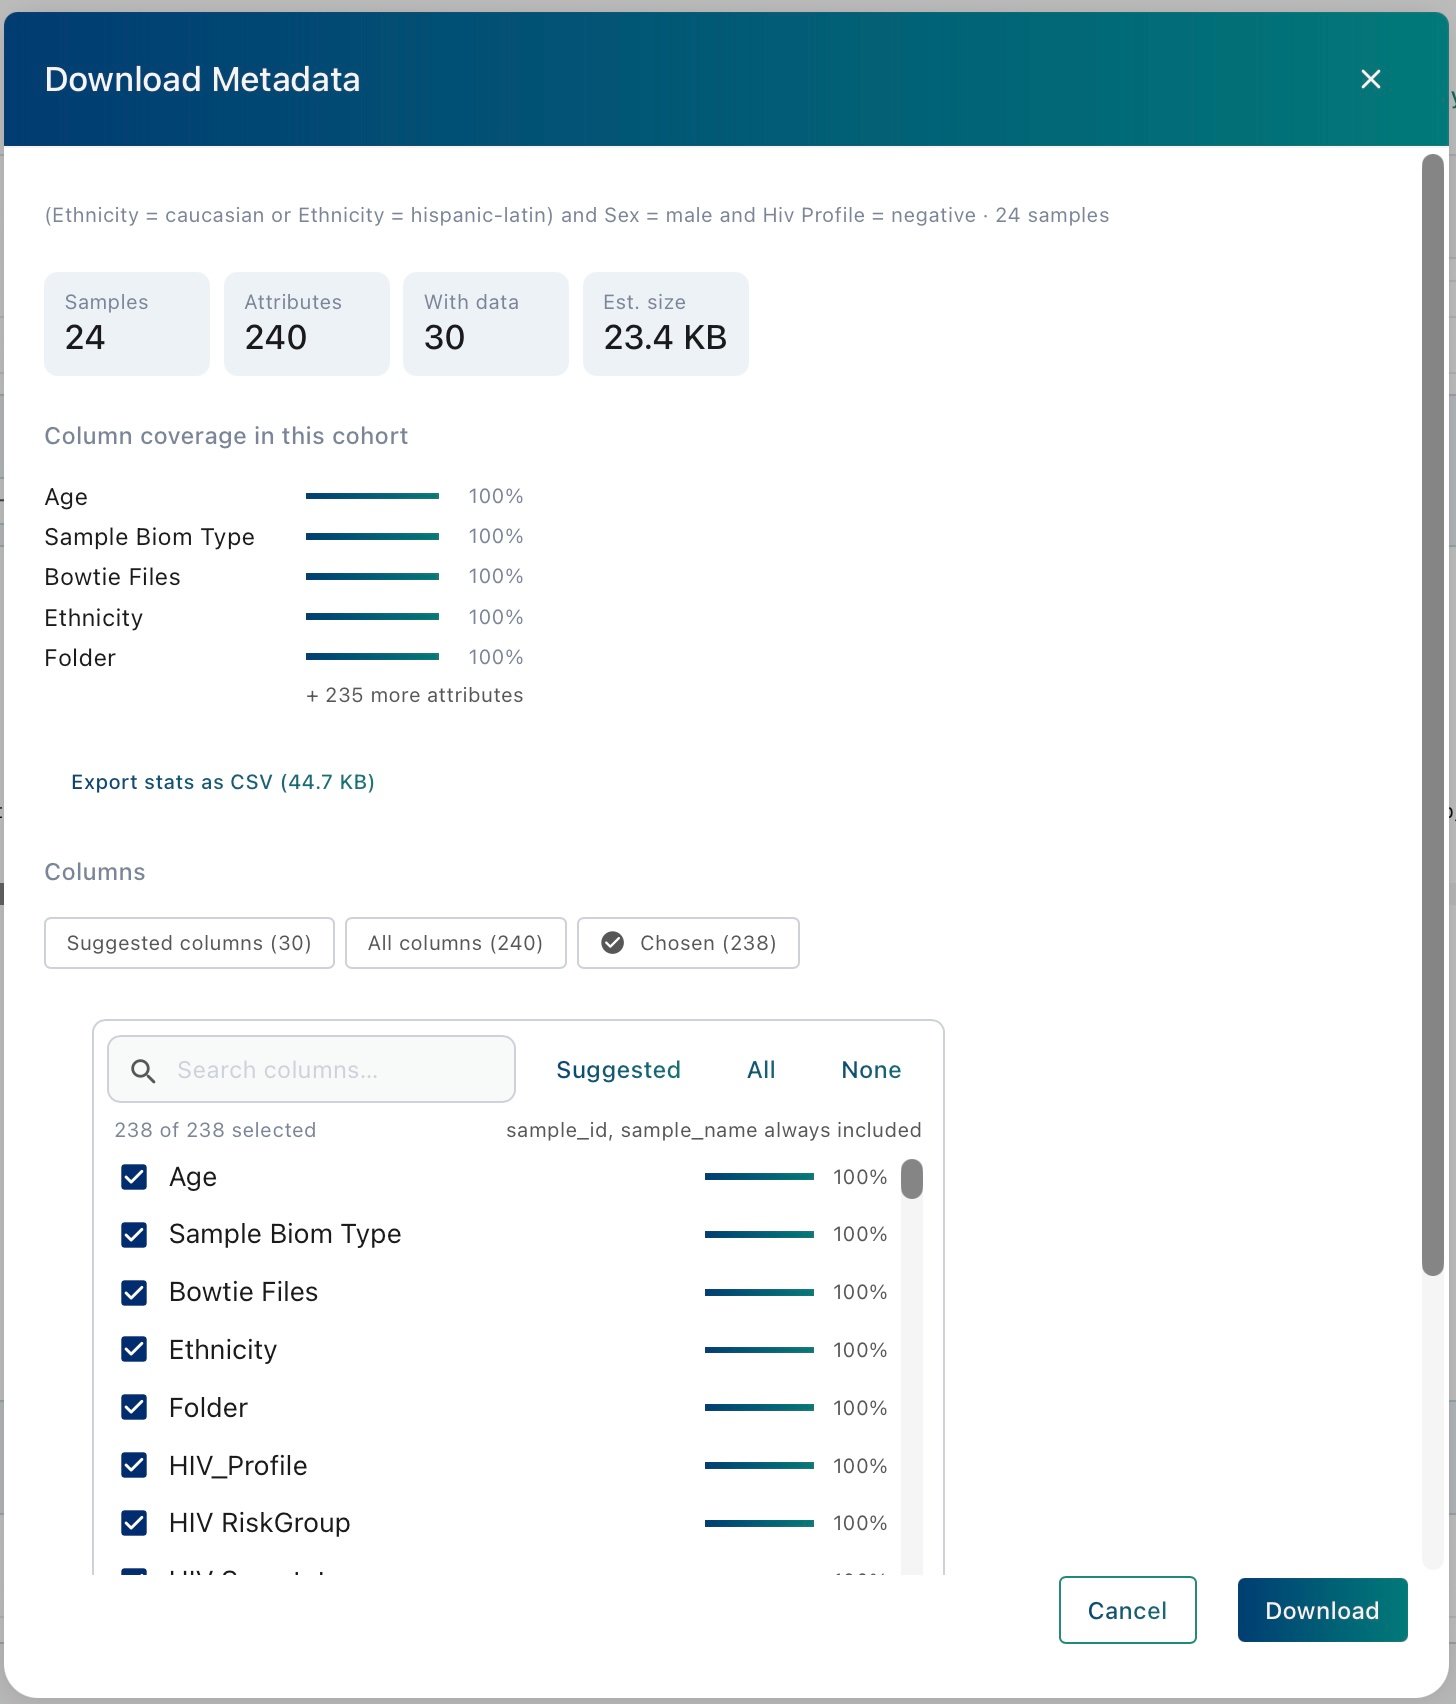 ### Column coverage
**Column coverage in this cohort** shows, for each metadata column, the percentage of samples in the cohort that have a value for it. **Export stats as CSV** downloads the coverage figures for every column.
### Choosing which columns to download
The **Columns** section controls what goes into the downloaded file. Filter the list with **Suggested columns**, **All columns** or **Chosen**, then tick columns individually, search by name, or select in bulk with **Suggested**, **All** and **None**. Each row shows that column's coverage, and the counter above the list tracks how many are selected. `sample_id` and `sample_name` are always included.
Click **Download** to export the metadata as a CSV with one row per sample and one column per attribute selected.
Run diversity, differential abundance, ordination and machine learning modules on your cohort.
### Column coverage
**Column coverage in this cohort** shows, for each metadata column, the percentage of samples in the cohort that have a value for it. **Export stats as CSV** downloads the coverage figures for every column.
### Choosing which columns to download
The **Columns** section controls what goes into the downloaded file. Filter the list with **Suggested columns**, **All columns** or **Chosen**, then tick columns individually, search by name, or select in bulk with **Suggested**, **All** and **None**. Each row shows that column's coverage, and the counter above the list tracks how many are selected. `sample_id` and `sample_name` are always included.
Click **Download** to export the metadata as a CSV with one row per sample and one column per attribute selected.
Run diversity, differential abundance, ordination and machine learning modules on your cohort.