

Roles and permissions
Cosmos-Hub 2.0 sets permissions on each object of an organisation, from workspaces down to studies, analyses and snapshots. Permissions set on a workspace cover the objects inside it, and permissions set on a single study, analysis or snapshot cover only that object. Org admins hold every permission on every object, and workspace owners hold every permission on their own workspace. Every other user is a collaborator and holds only the permissions that an org admin or a workspace owner gives them.- Roles
- Permissions
Common Setups
Users and Groups
Managing Users and Groups across an Organisation
To see the users and groups of your organisation, click the Organisation icon at the bottom left of the interface, then open Users or Groups. The Users and Groups pages list every member and user groups of the current organisation and allow to manage them.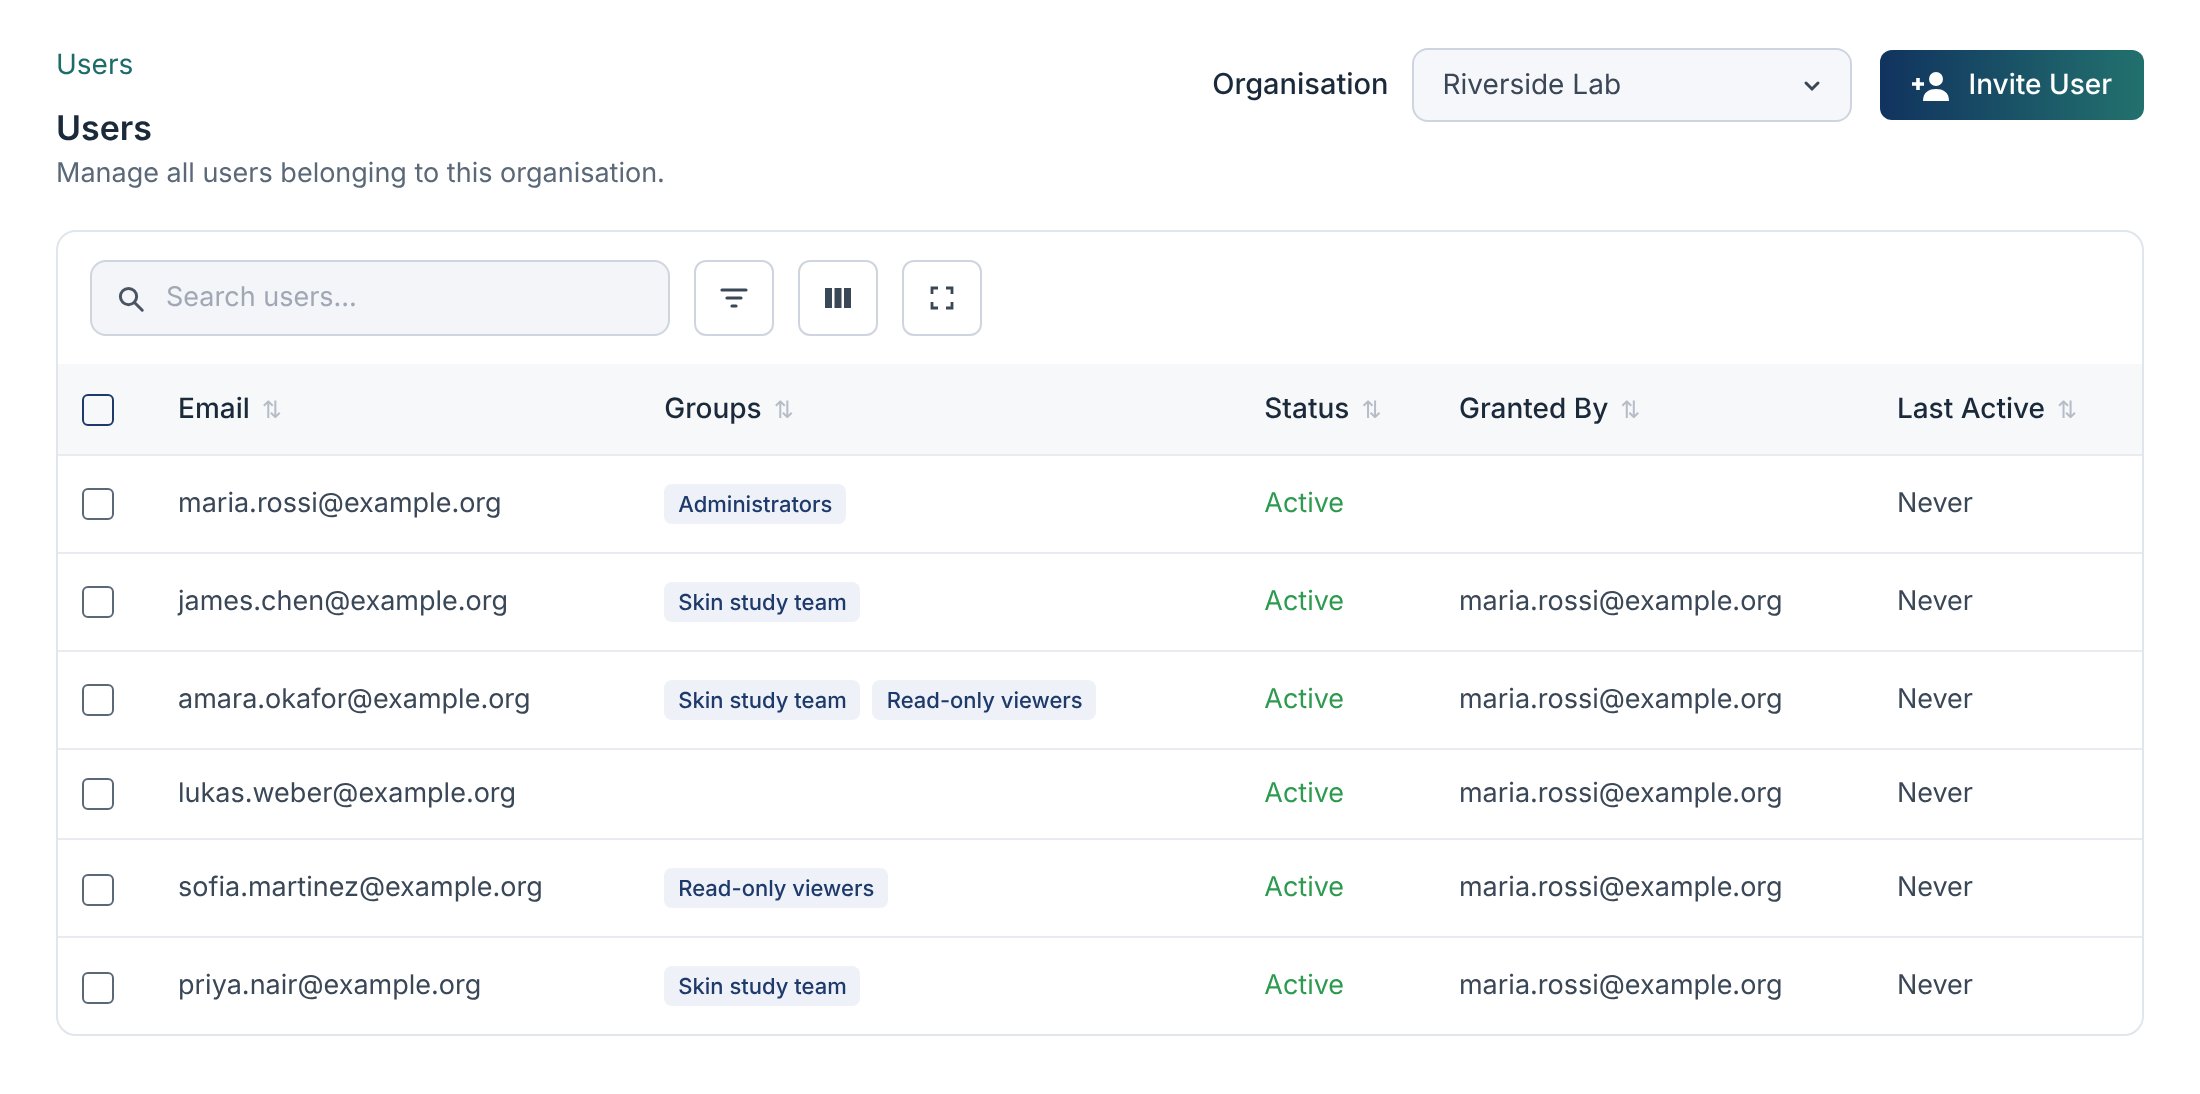
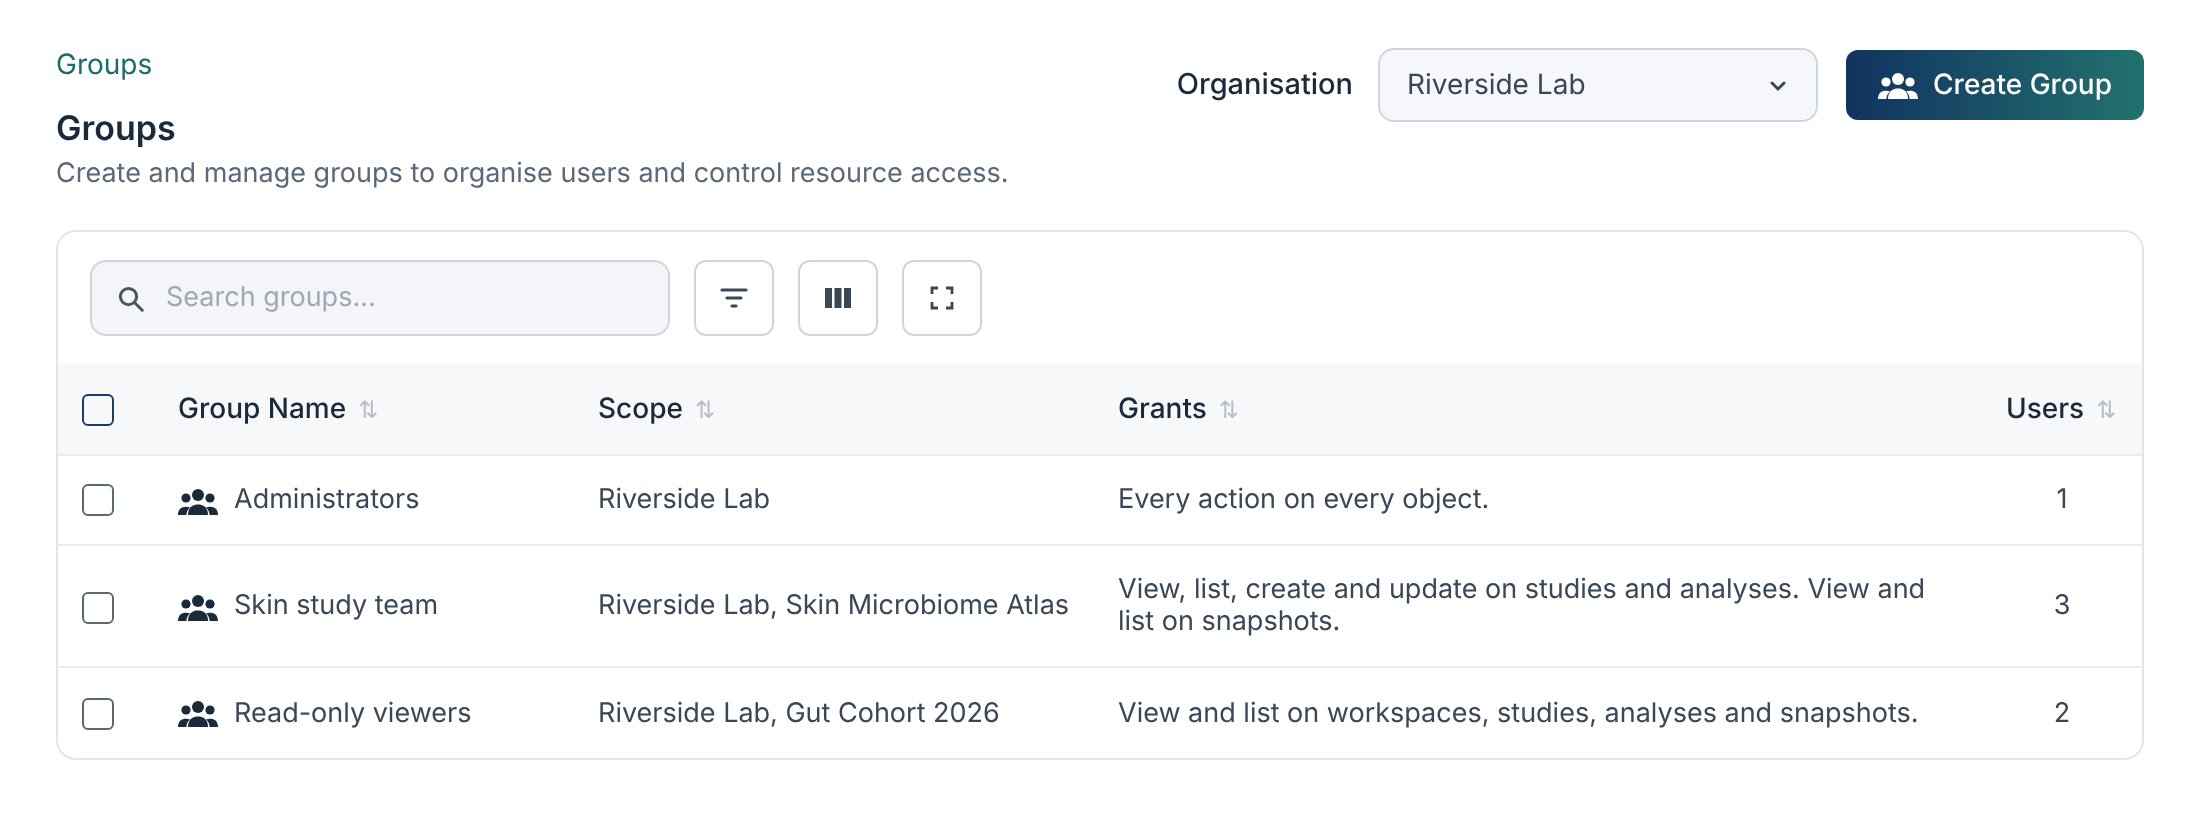
The user and group dashboard
Clicking on any User or Group in the list to access the User and Group Dashboard, which allows profile and activity auditing, and setting individual permissions etc for a individual user/group. Click a user in the Users list, or a group in the Groups list, to open its dashboard.
- Overview
- Permissions
- Activity
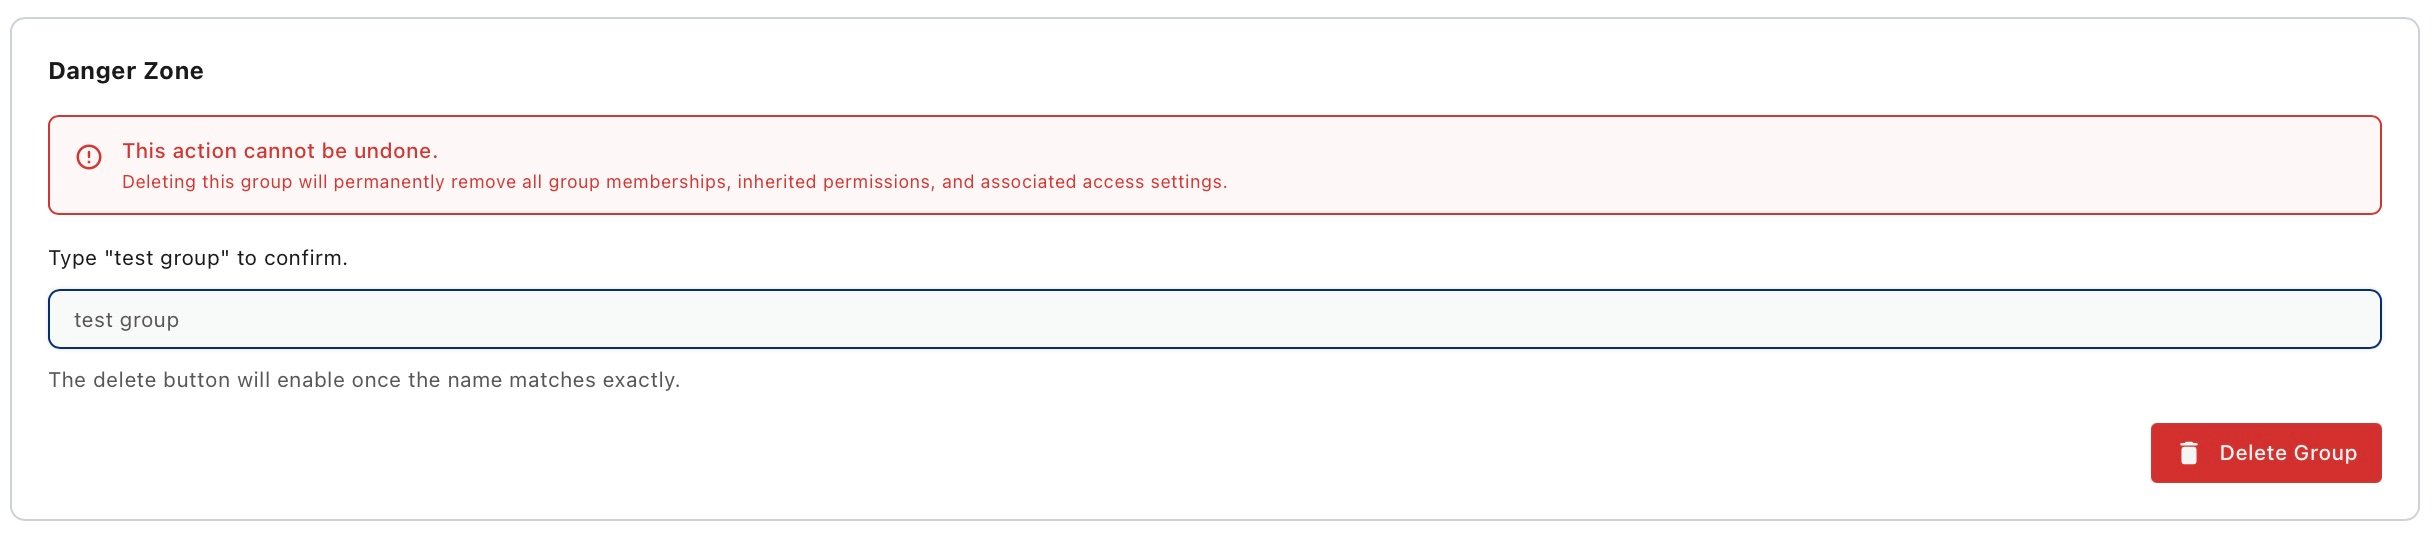
Profile shows the status of the user and the date they joined the organisation. Assigned Groups lists the groups of the user, and Danger Zone contains the option to delete the user. For a group, the Overview tab shows its name and members, and the option to delete it.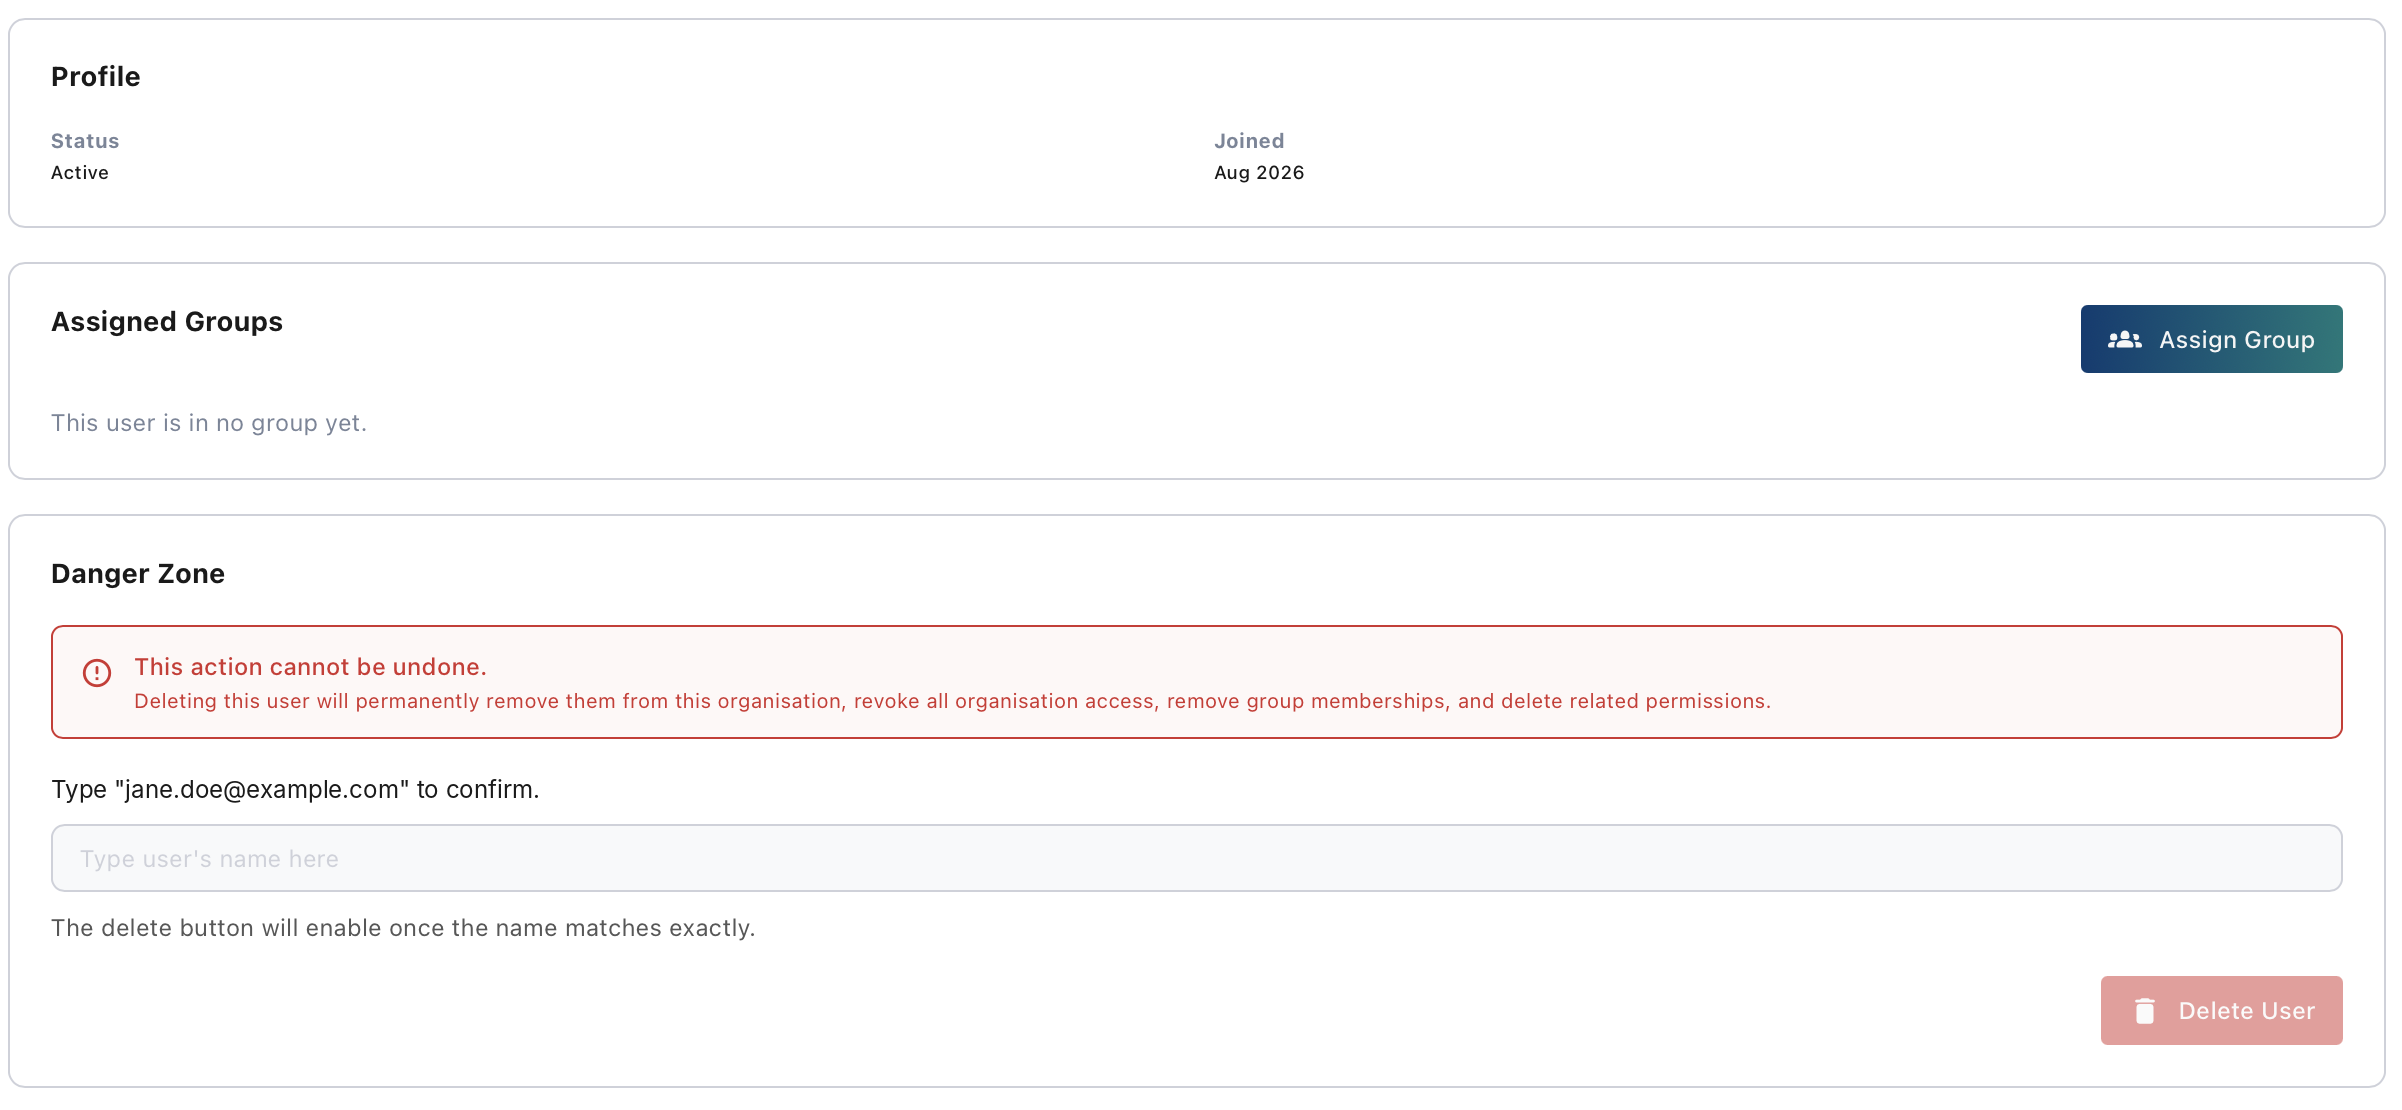
Inviting a new users to an organisation
To invite a user, click Invite User on the Users page, enter their Email Address, optionally tick under Assign Groups the groups they should be part of, and click Send Invitation.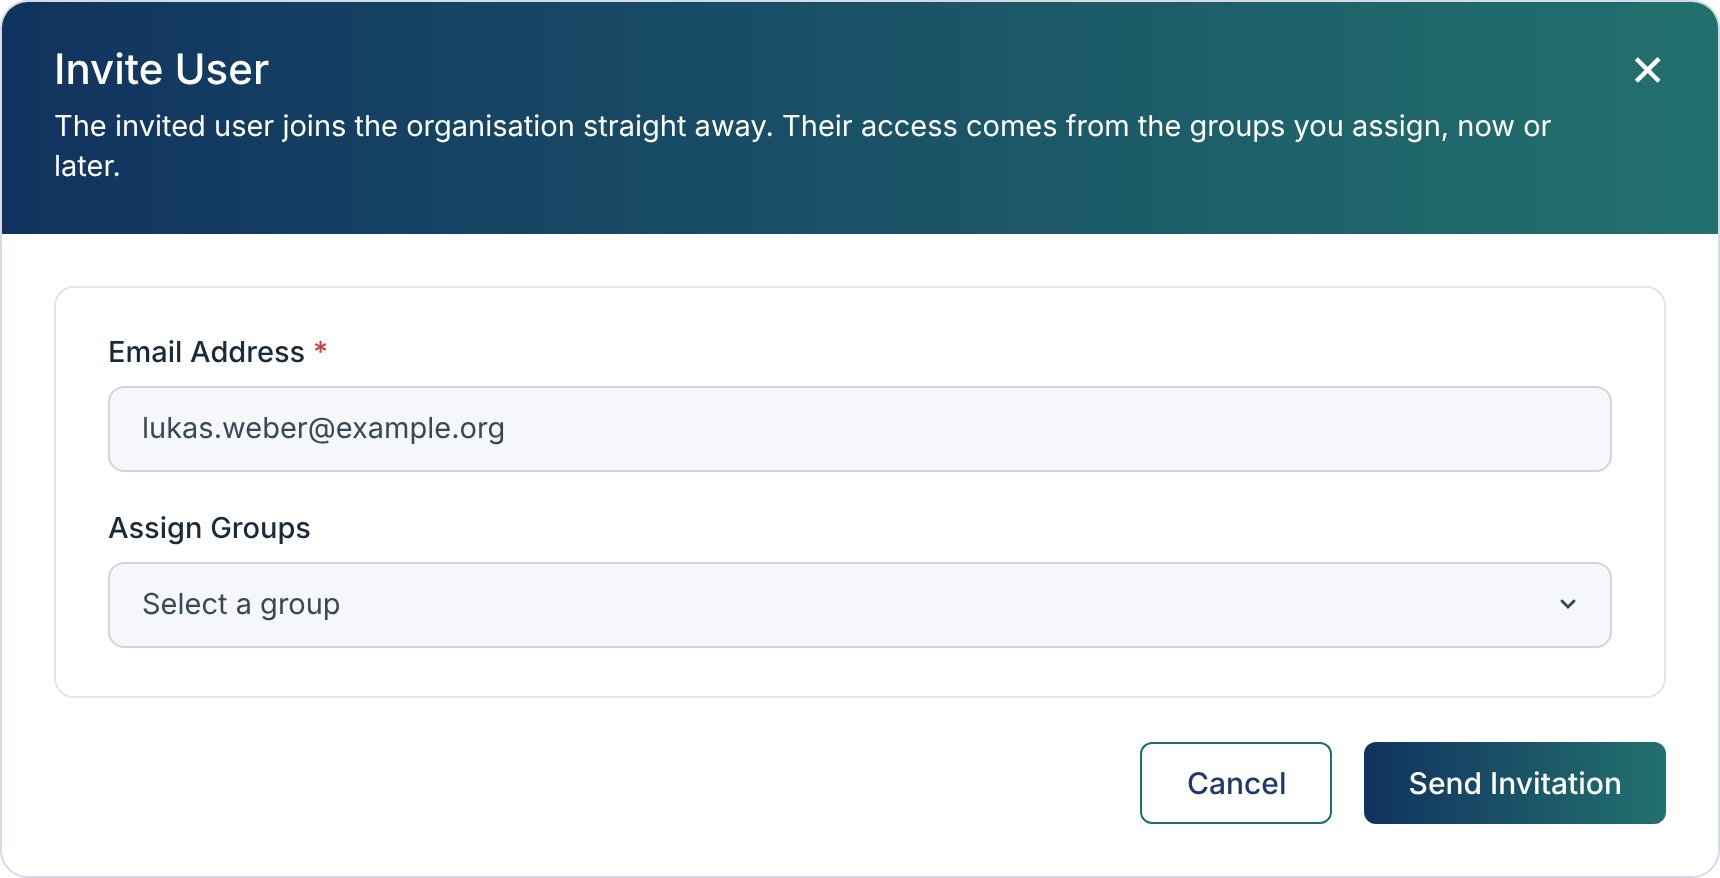
Create a User Group
To create a group, click Create Group on the Groups page. Enter a Group Name and (optional) select Initial Users members of that group, and click Create Group. Note: not selecting any user will create a group with only the owner as member of that group.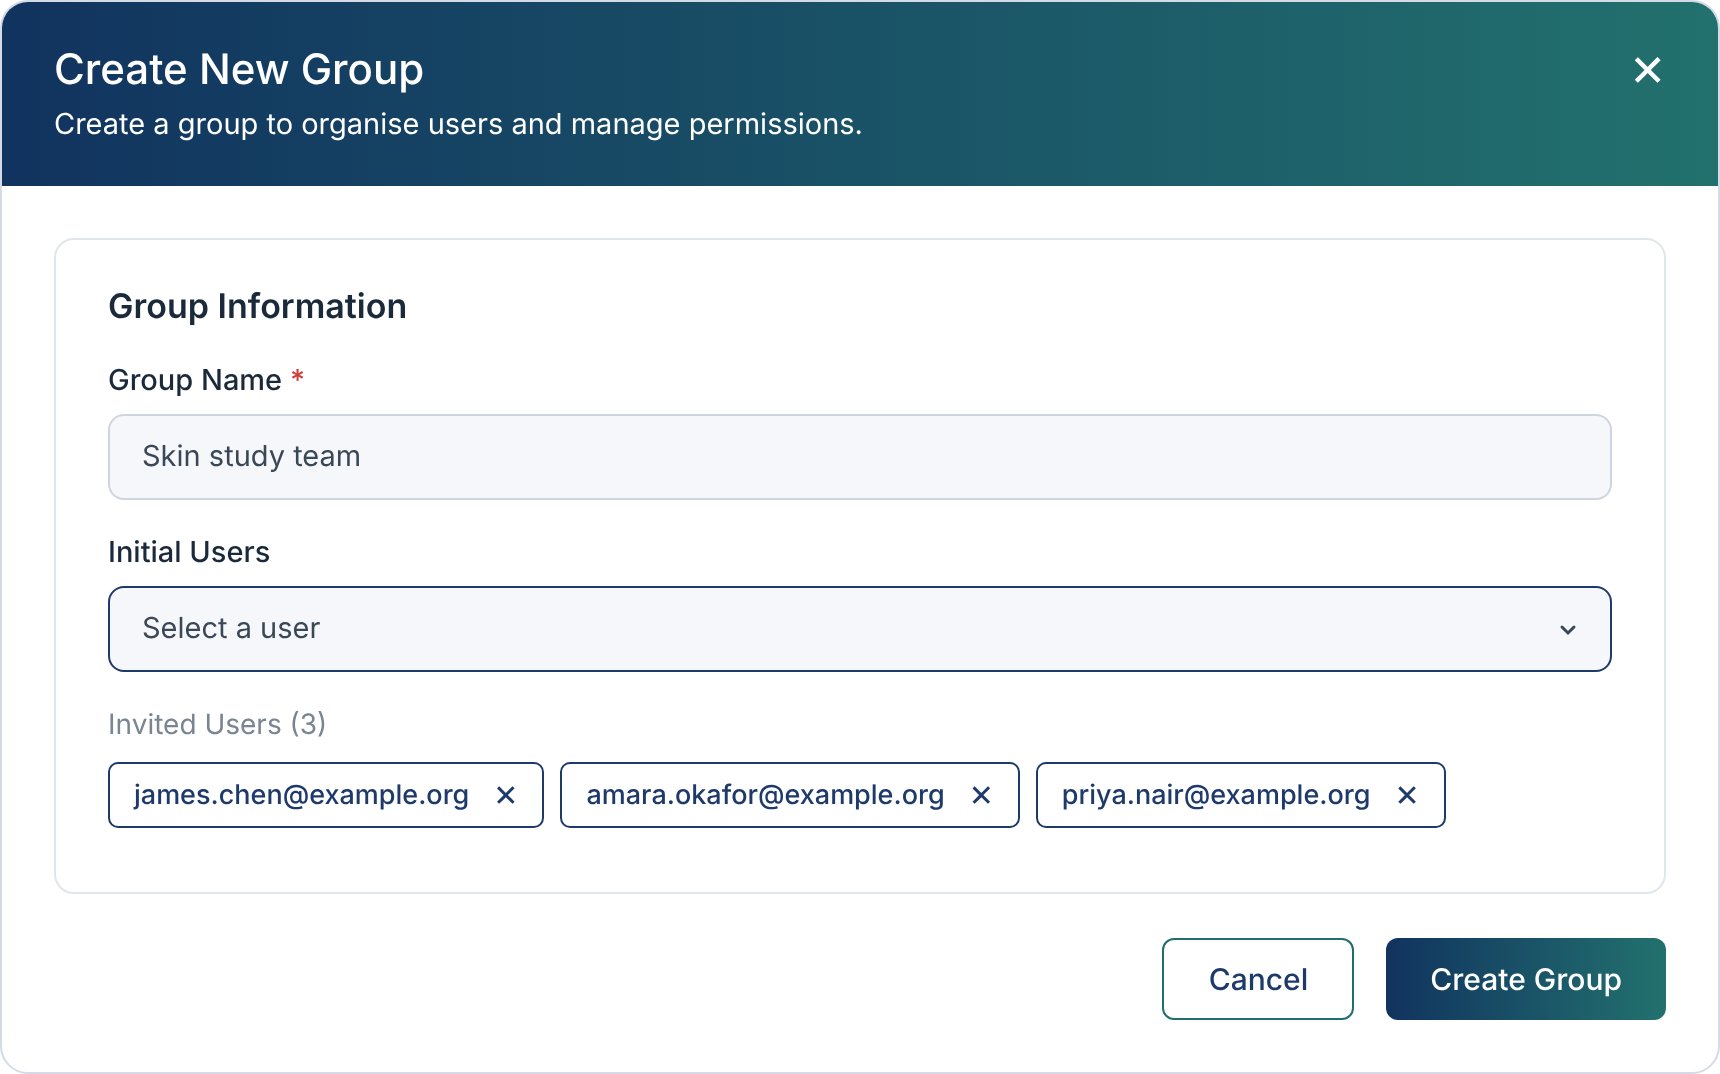
Add users to a group
Click the group in the Groups table and add one or more users from its Overview tab. To add a single user to a group, you can also open the user and click Assign Group on their Overview tab.Delete a user or a group
Set permission overrides for a single user
Set specific permissions for a specific user (e.g: when they need access that differs from their groups, for example one extra permission on a study).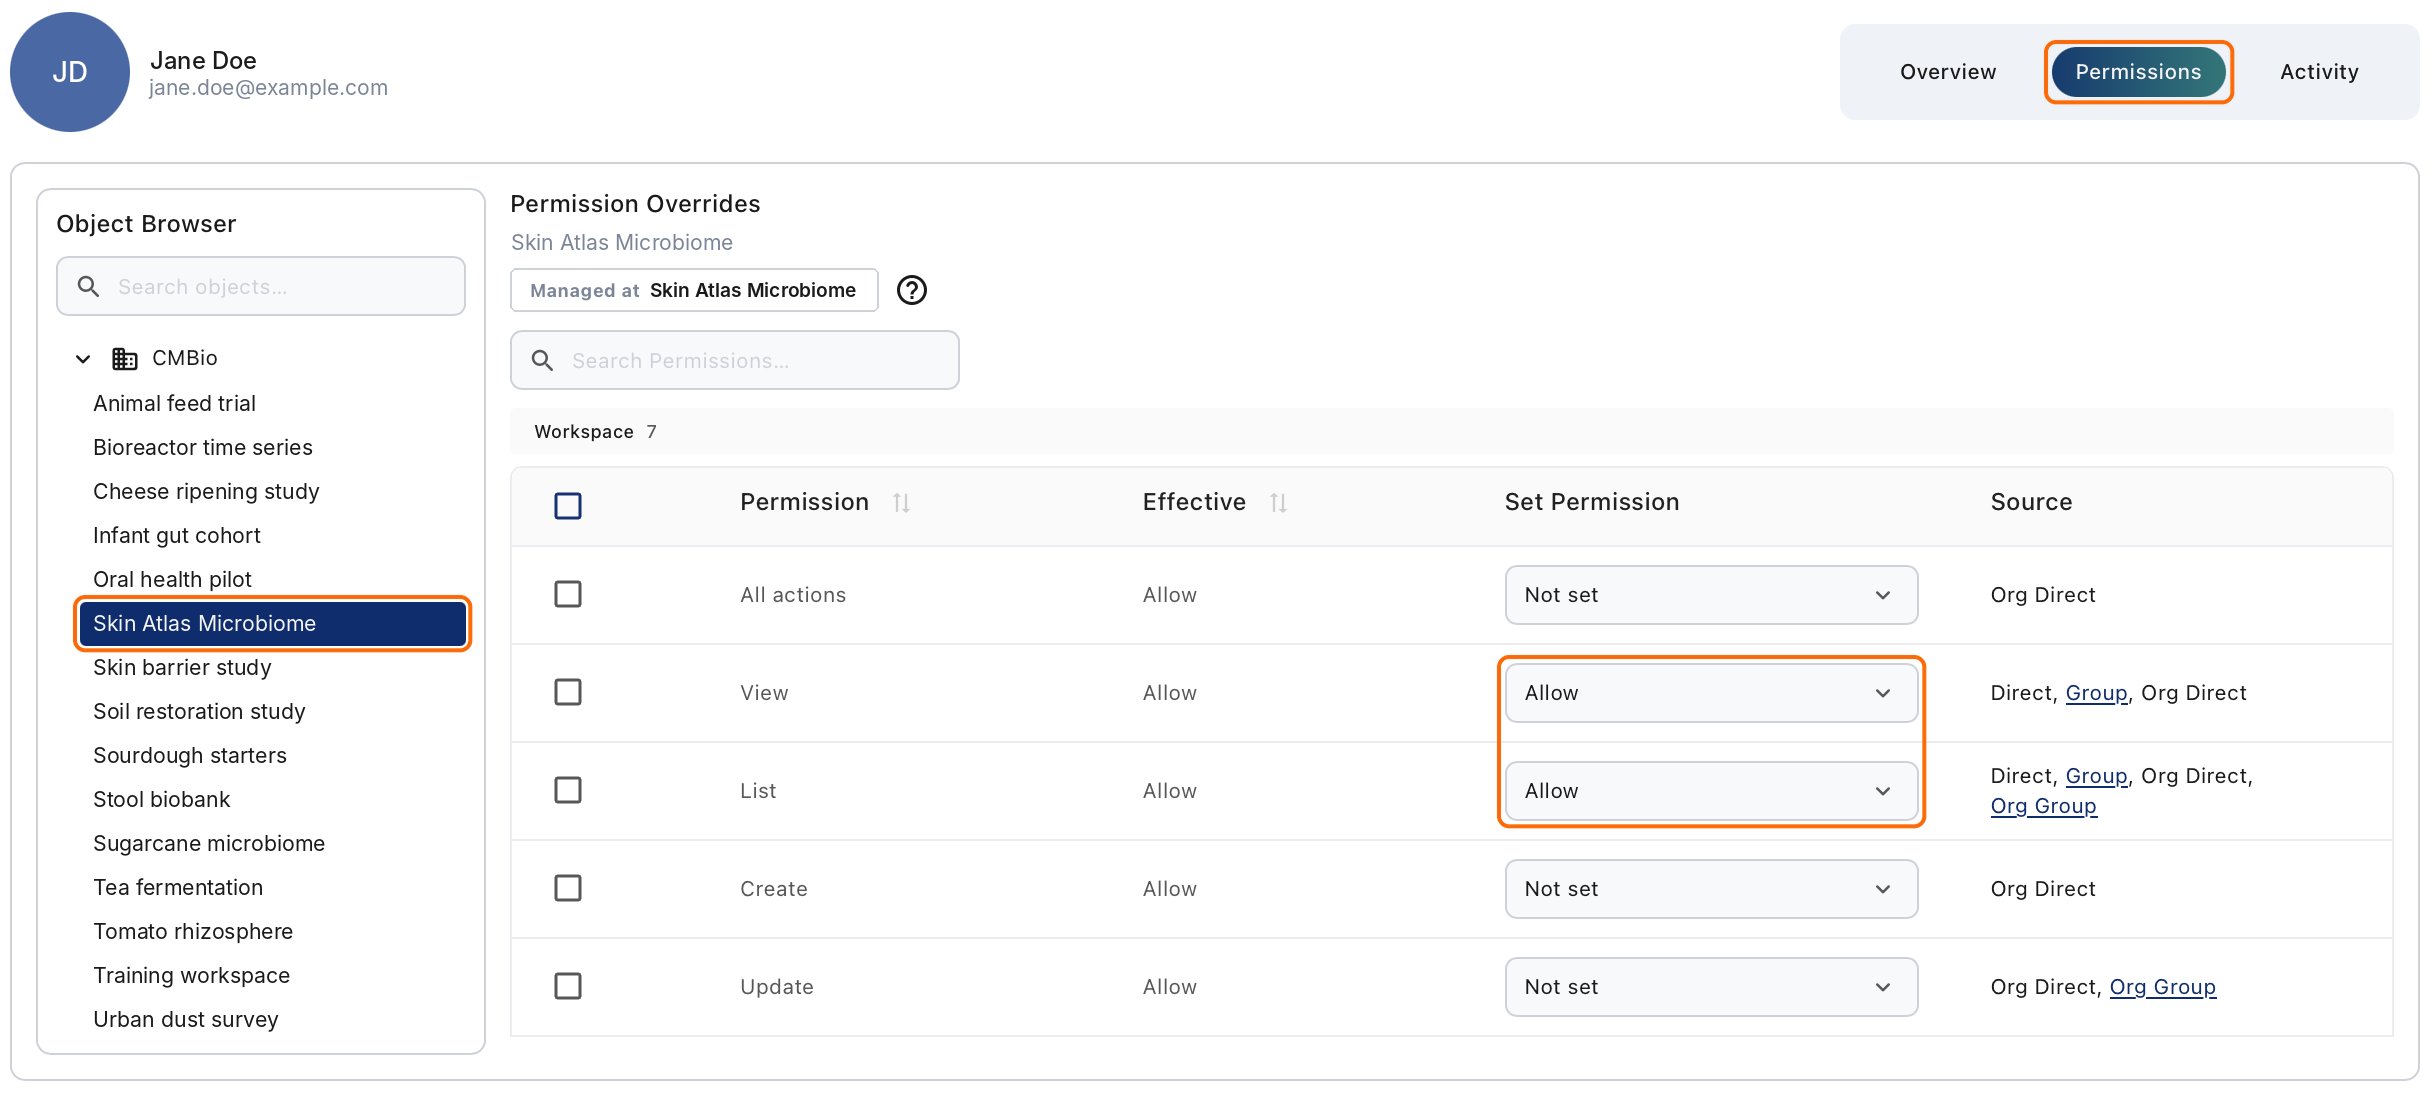
Permission Centre
The Permission Centre is the main control panel to define user and group permissions for all the workspaces and objects of a Cosmos-Hub 2.0 organisation. To access the Permission Centre, click the Organisation icon at the bottom left of the interface, then open ‘Permission Centre’.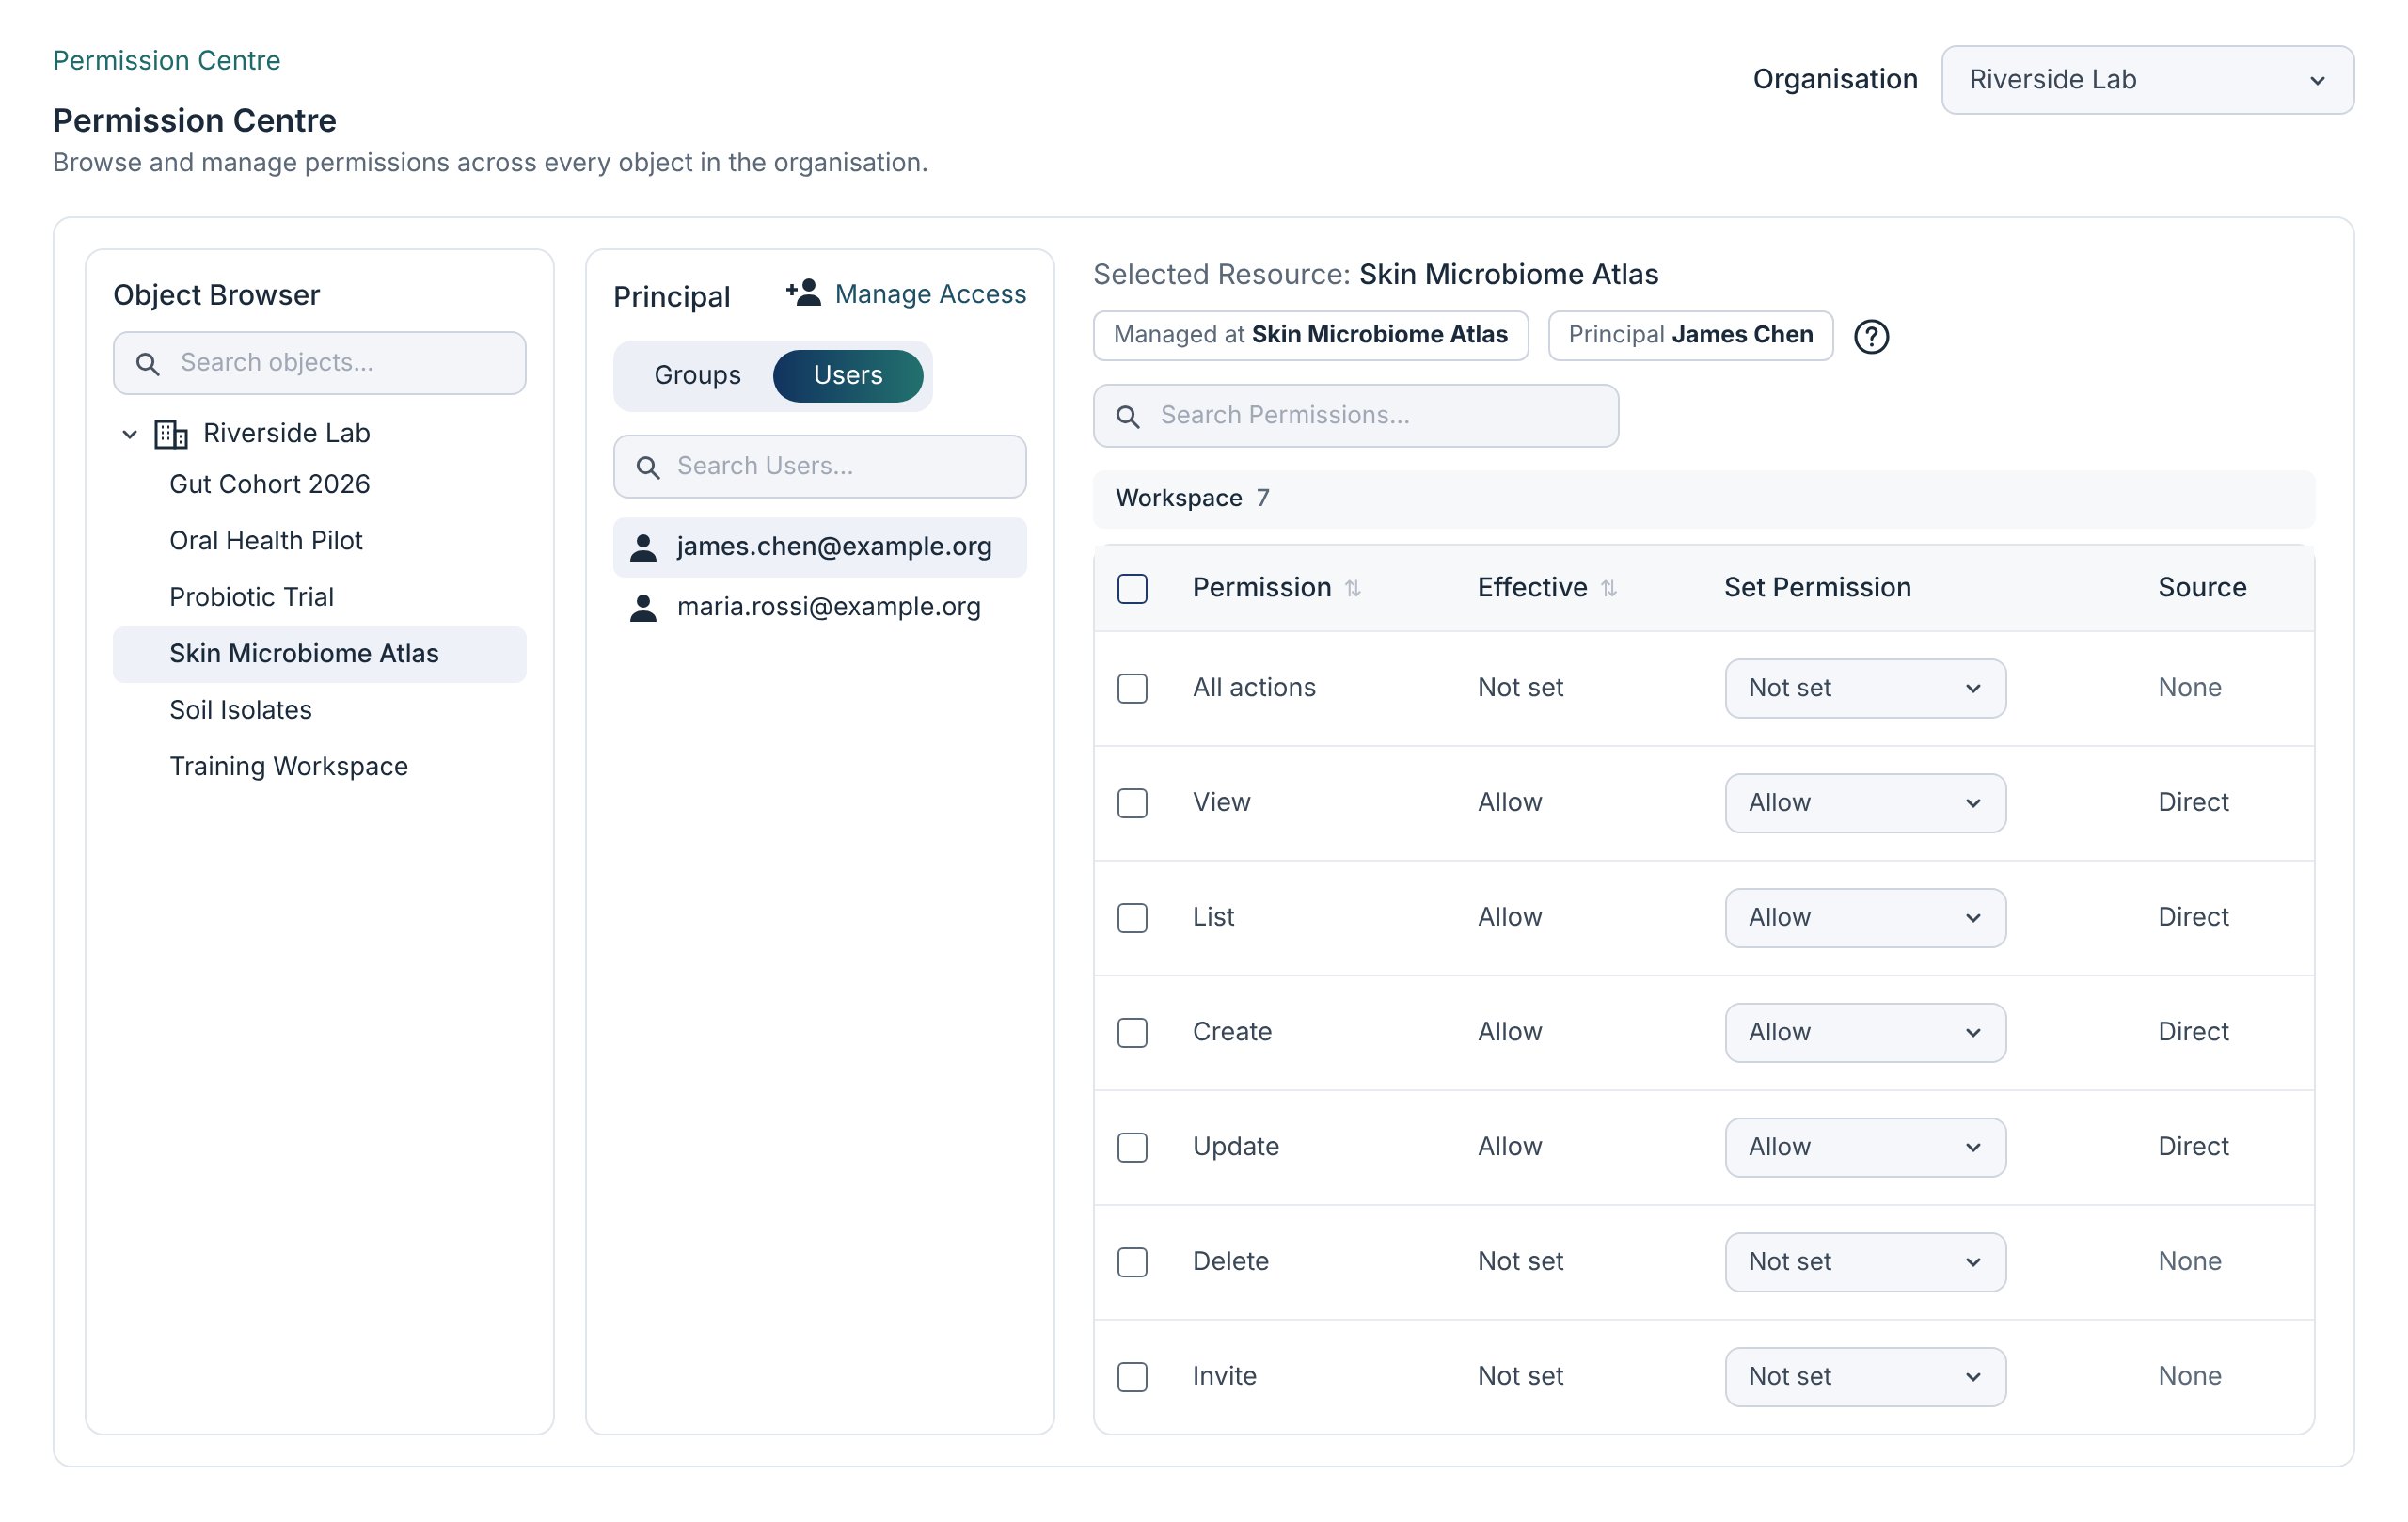
Permission Centre with the Object Browser, the Principal panel and the permission tables of a group
- Object Browser lists the workspaces of the organisation. Select a workspace to see and manage who can access it.
- Principal lists the groups and users that have access to the selected workspace. Click Manage Access to add or remove groups and users.
- The permission panel shows the permissions of the selected group or user on the selected workspace and on the studies, analysis projects and snapshots inside it. Use the Set Permission dropdown to change a permission. For each permission, Effective shows the permission that currently applies, and Source shows where it comes from.
Setting permissions for an object
1
Select the Workspace
In the Object Browser, select the workspace to manage (e.g: Skin Atlas Microbiome). Use Search objects to quickly find a workspace by name.
2
Choose a user or a group
In the Principal panel, select a group (e.g: Skin Atlas Microbiome users group) or** user **to open the permission panel and inspect actions that allowed for them on the selected workspace.
3
Update a user or group permissions for a workspace-related object
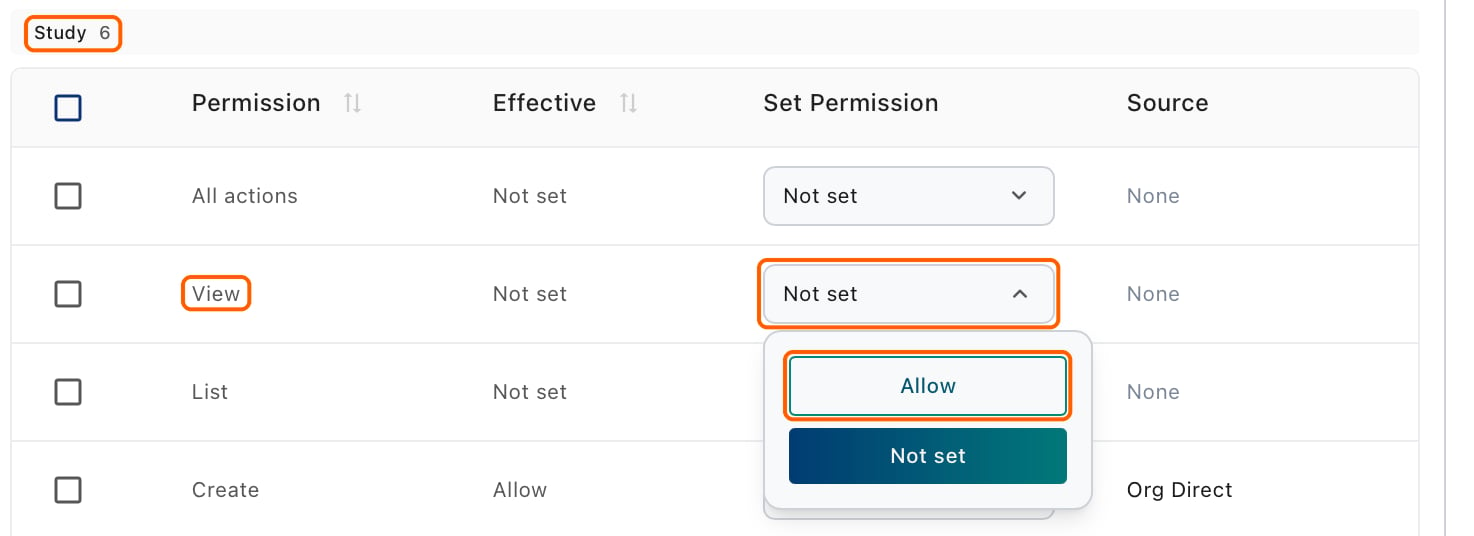
Allow the Skin Atlas Microbiome users group to view the studies of the Skin Atlas Microbiome workspace.
4
Save Changes
Click on ’ Save Changes’ to update permissions
Update a single user or group permissions
Set permissions on a single user when they need access that differs from their groups, for example one extra permission on a study.- On the Users page, click the user.
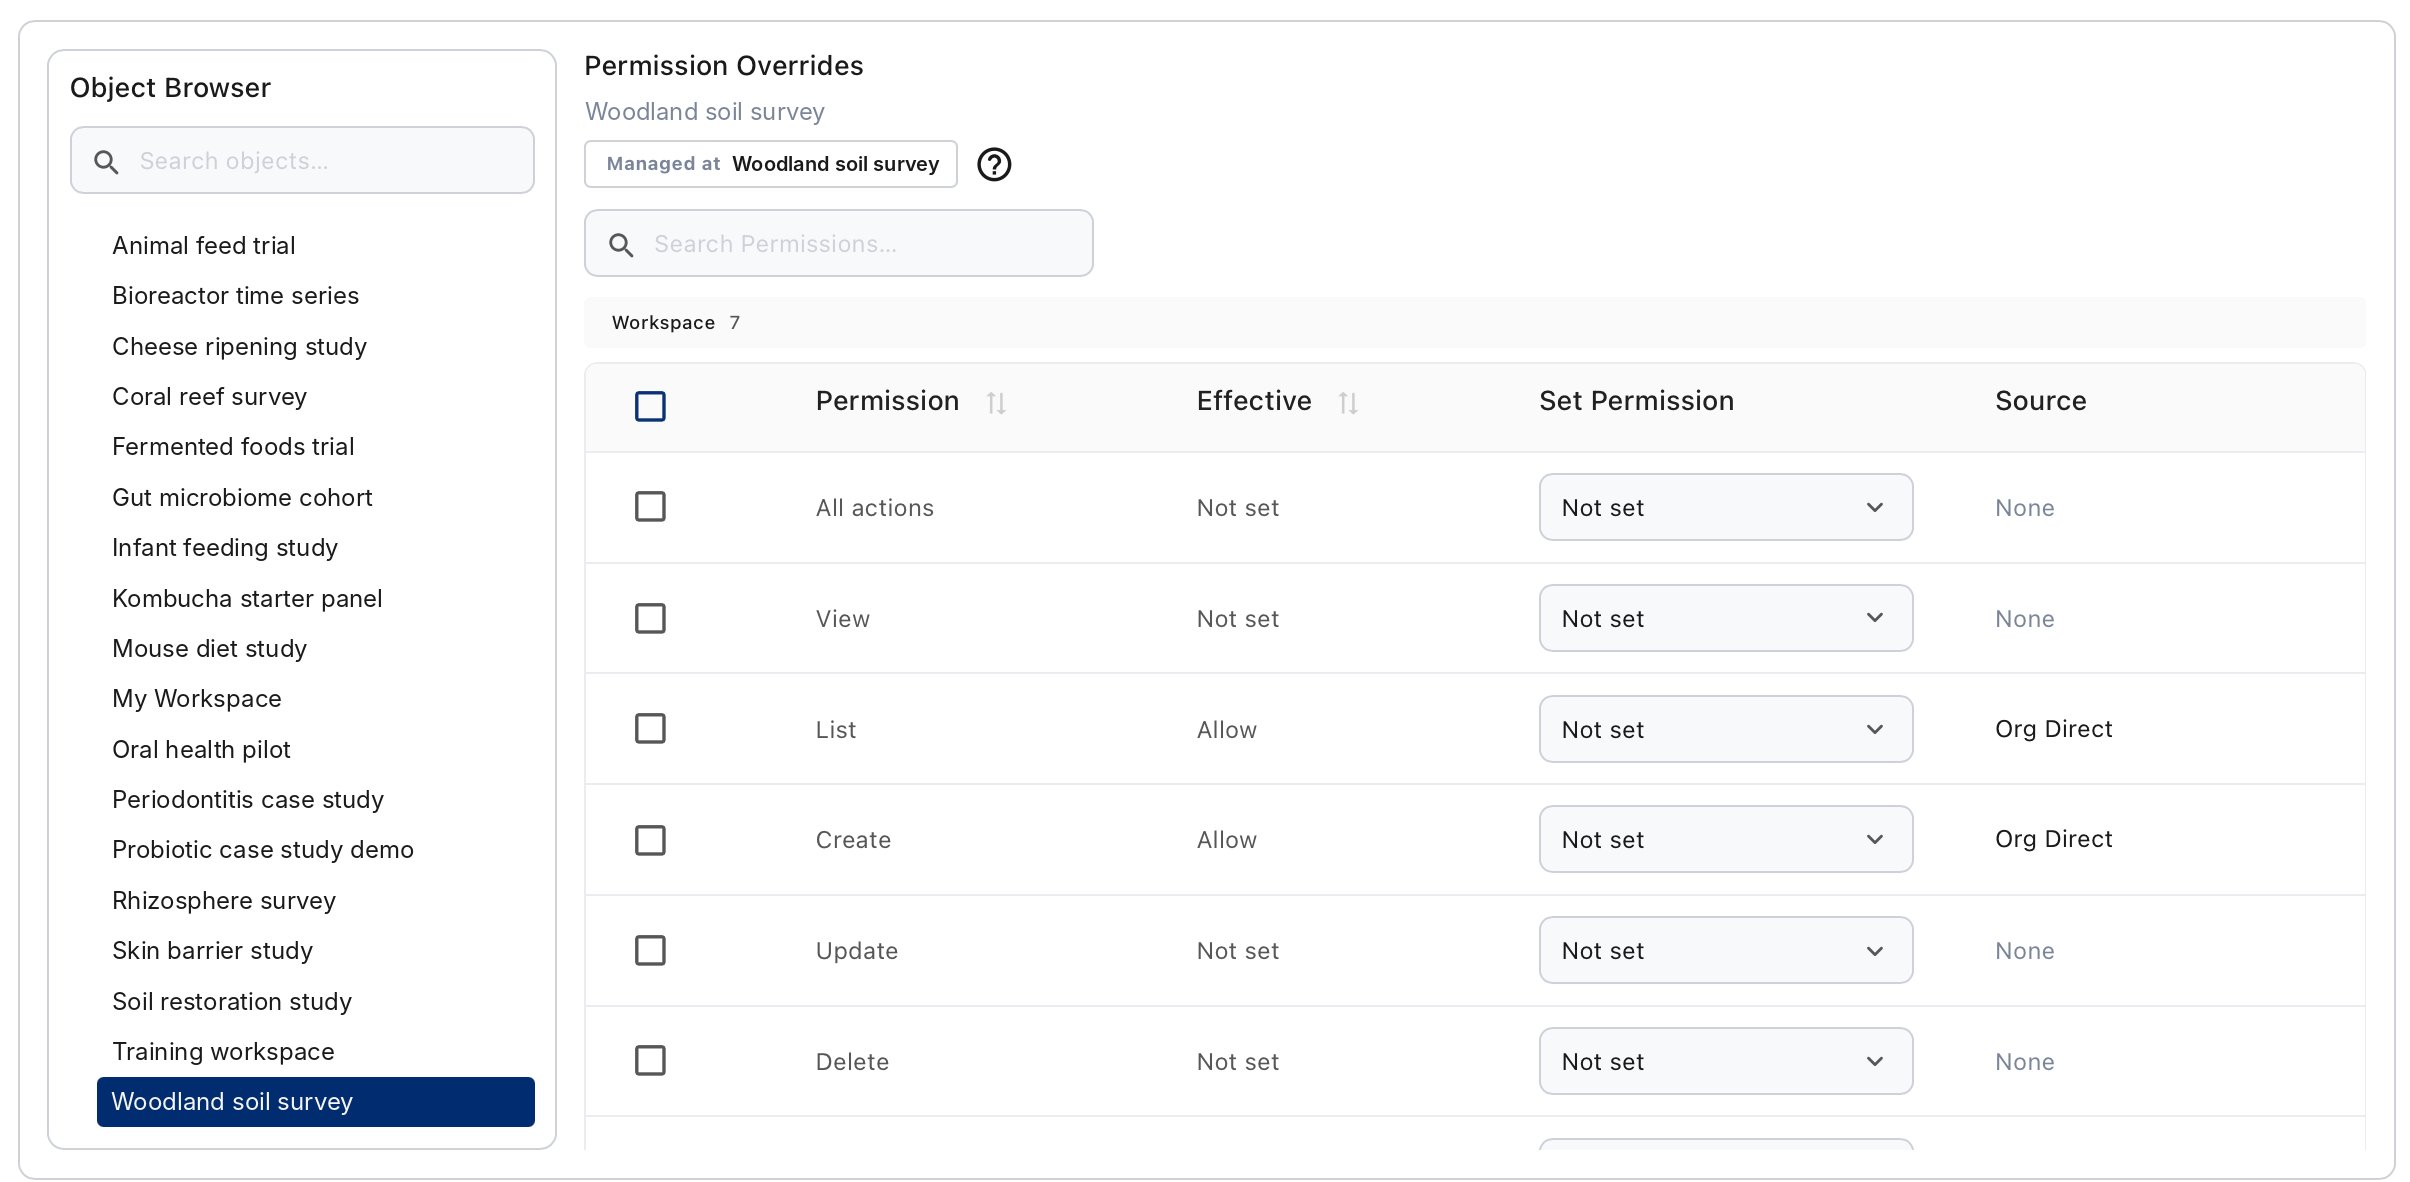
- Open the Permissions tab. The tab lists the Permission Overrides of the user, that is the permissions set directly for them.
- In the Object Browser, select the object, then choose the values under Set Permission.
Organisation Administration
To update organisation details, click the Organisation icon at the bottom left of the interface, then open Organisation Administration. Note: this section is accessible to Organisation admins only. Organisation administrators can updated the logo, name or description.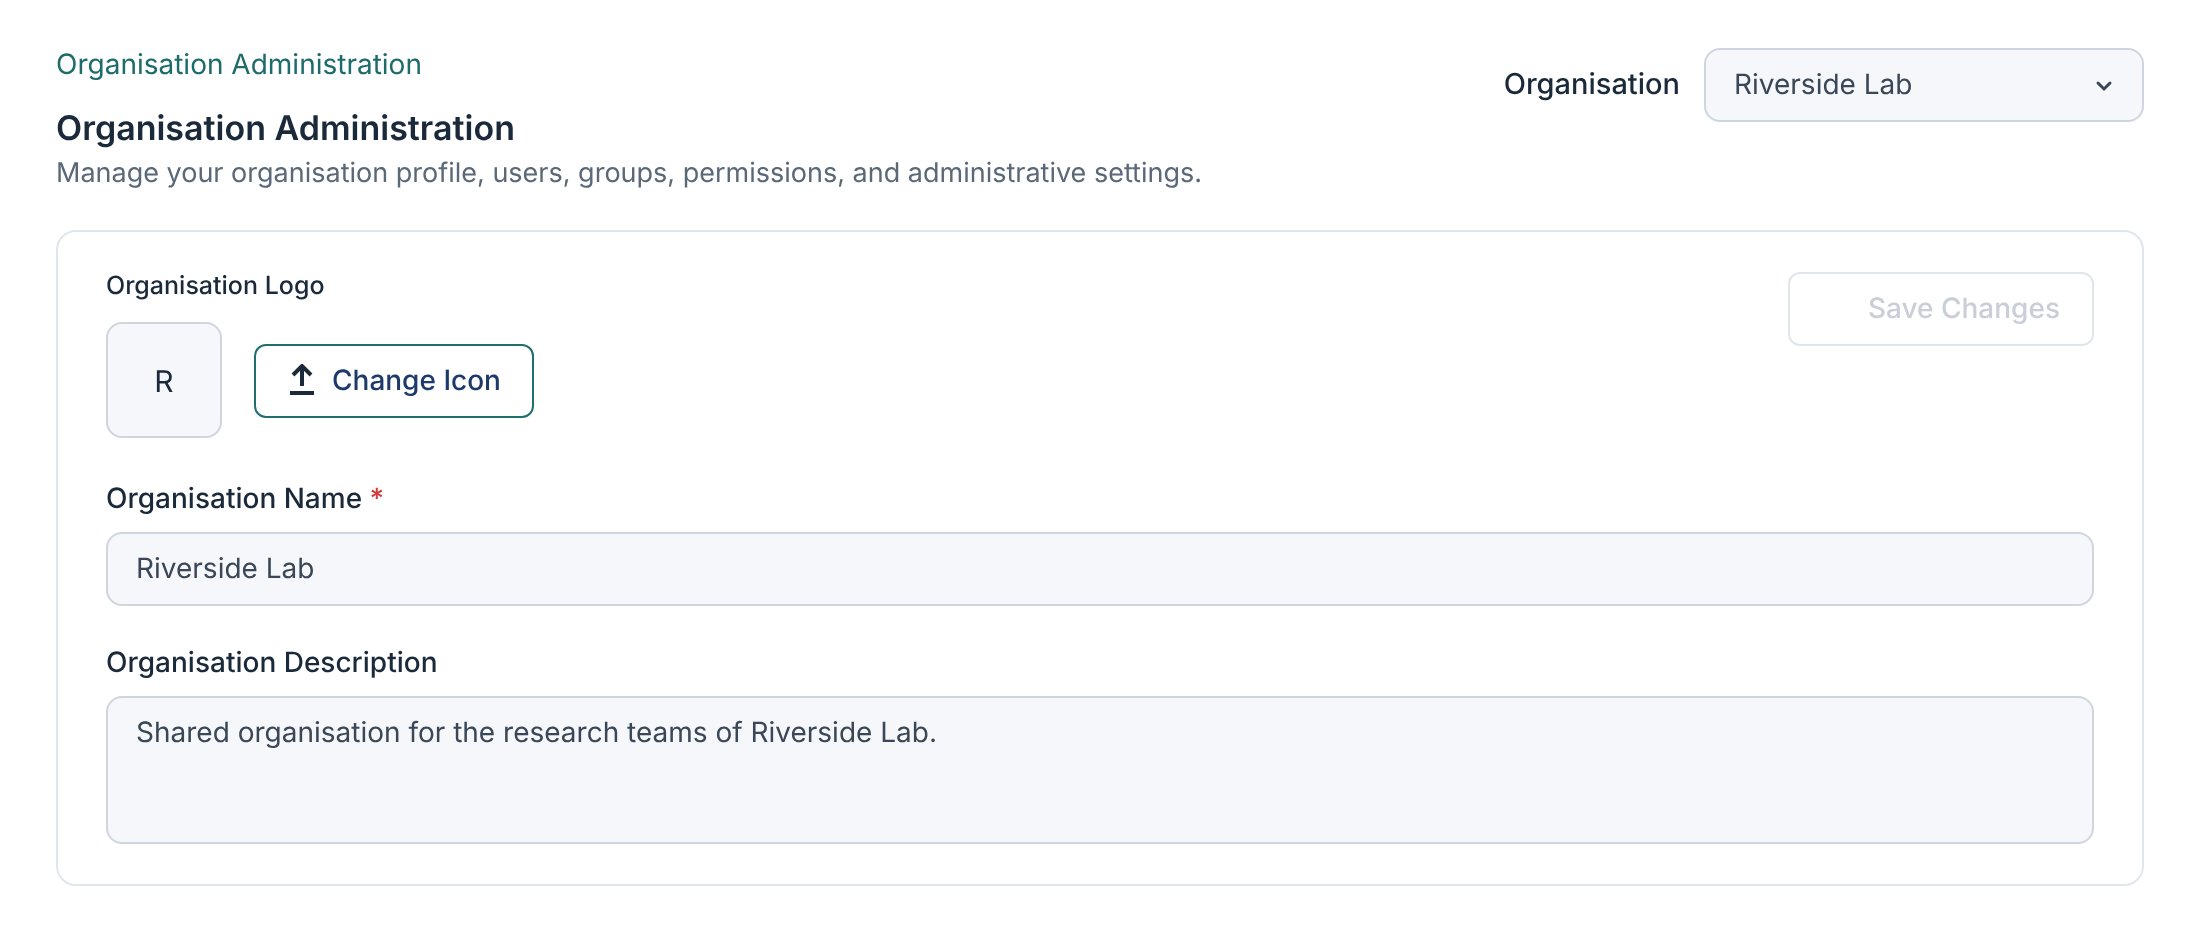
Next steps
Workspaces
Organise the data of your teams in workspaces.
Studies
Create studies inside a workspace.