

- Sample metadata is the table of variables that describe each sample, for example the body site, the age of the participant or the sampling time point.
- A Feature Table holds the abundance of each feature across your samples. A feature is the unit that the profile measures, such as a taxon, a gene function or a metabolite.
Before you start
- Create or join the study that will receive the data.
- Save your feature tables as CSV or TSV files.
- Check whether your samples already have metadata in Cosmos-Hub. If they do, you can reuse it instead of uploading a metadata file (step 3).
Import custom data into a study
1
Open Import Custom Data
In the Study Dashboard, click + Import Data to open the import menu, then click Import Custom Data.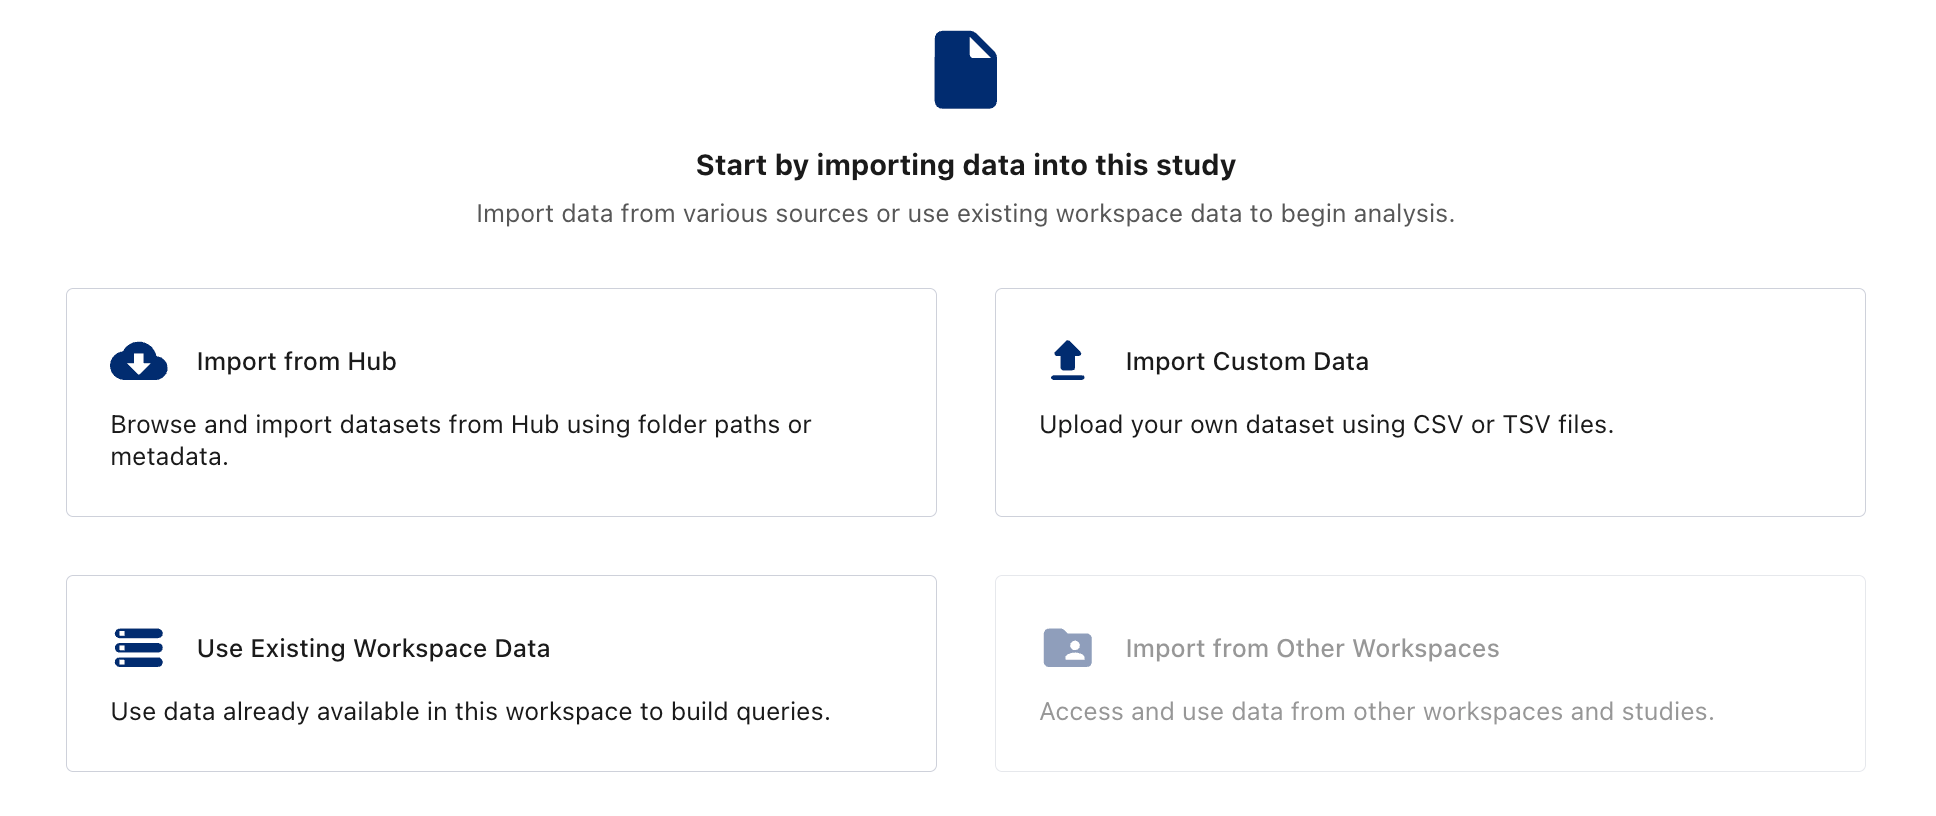
2
Feature table template selection
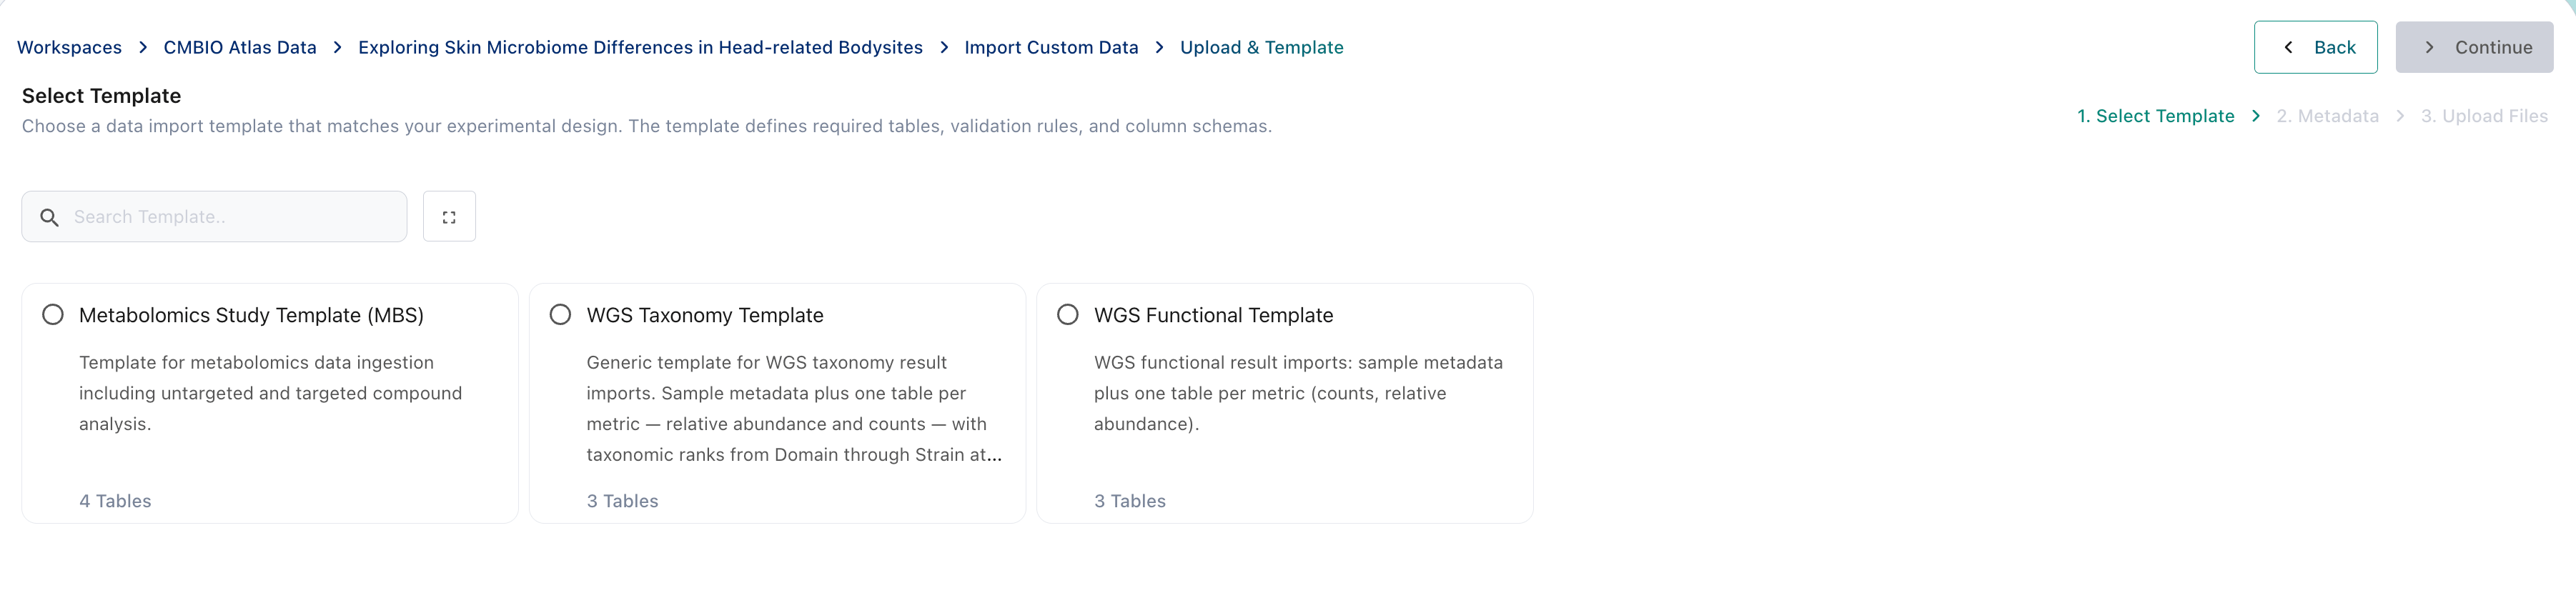
- Metabolomics (MBS)
- WGS Taxonomy
- WGS Functional
The Metabolomics Study Template (MBS) covers untargeted and targeted compound analysis, with three feature tables.
- Untargeted Peak Values, peak intensities of untargeted compounds, as decimal values or <LOD (below the limit of detection)
- Targeted Peak Values, peak measurements and quality metrics of targeted compounds
- Targeted Counts, counts and quality metrics of targeted compounds
3
Add the sample metadata
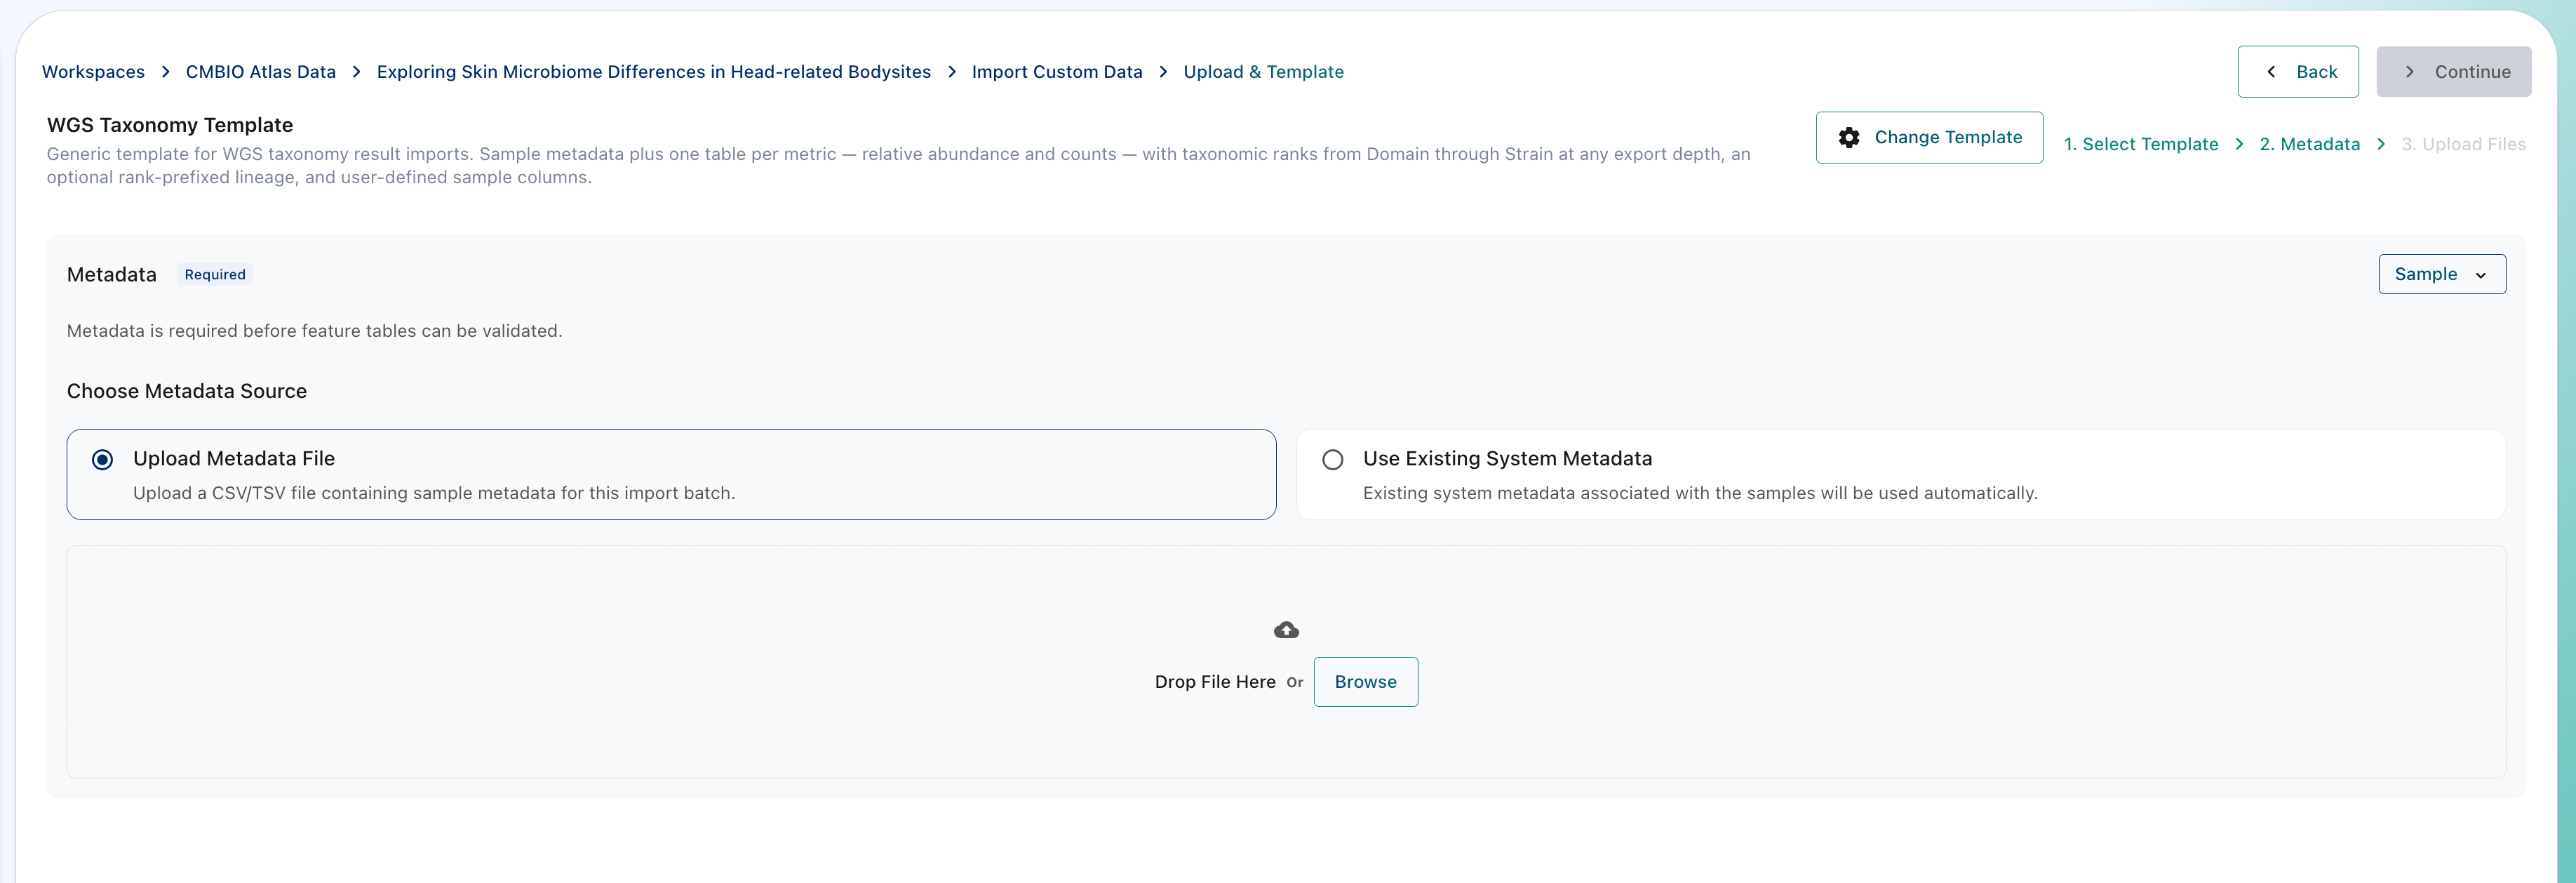
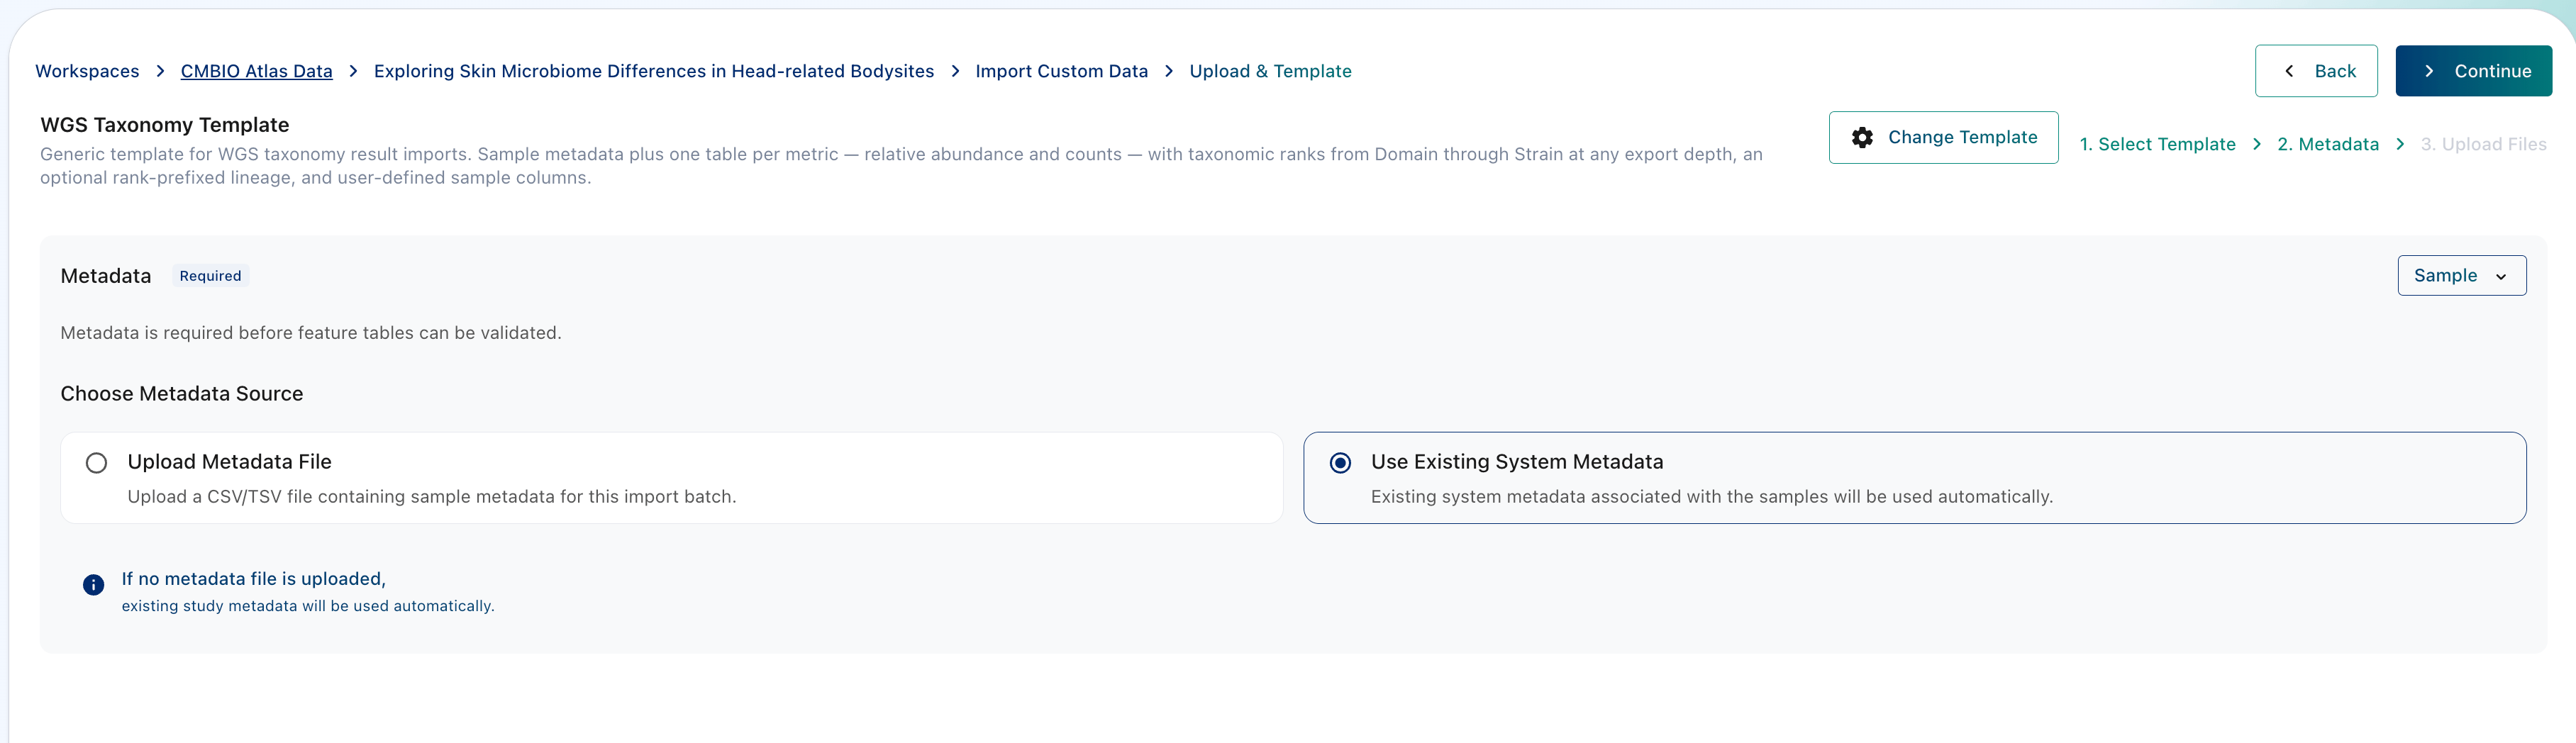
The platform validates the feature tables against the sample metadata, so the metadata must describe every sample that appears in the feature tables. Under Choose Metadata Source, select the option that matches what you are importing.
Upload Metadata File
Use this option when:
- The samples in your Feature Table have no metadata in Cosmos-Hub yet, for example when you import a completely new data table.
- You add new samples to an existing data table.
Use Existing System Metadata
Use this option when:
- The samples in your Feature Table already have metadata in Cosmos-Hub through another data table, for example when you add a new ‘omics data type for the same samples.
- Upload Metadata File
- Use Existing System Metadata
- Open the Sample menu at the top right of the Metadata panel and download the metadata template.
- Fill in the template with your samples and metadata variables in a spreadsheet editor.
- Save the file as CSV or TSV.
- Drag the file onto Drop File Here, or click Browse and select it.
- Check that the file has the status Valid and that its number of rows matches the number of samples.
The metadata file must follow the structure of the metadata template. For instructions on how to fill in the template, see Uploading Metadata. If your file doesn’t pass the metadata validation framework, download the import report to find the errors (see Check the import report below).
-
Click Continue.
4
Upload the feature tables
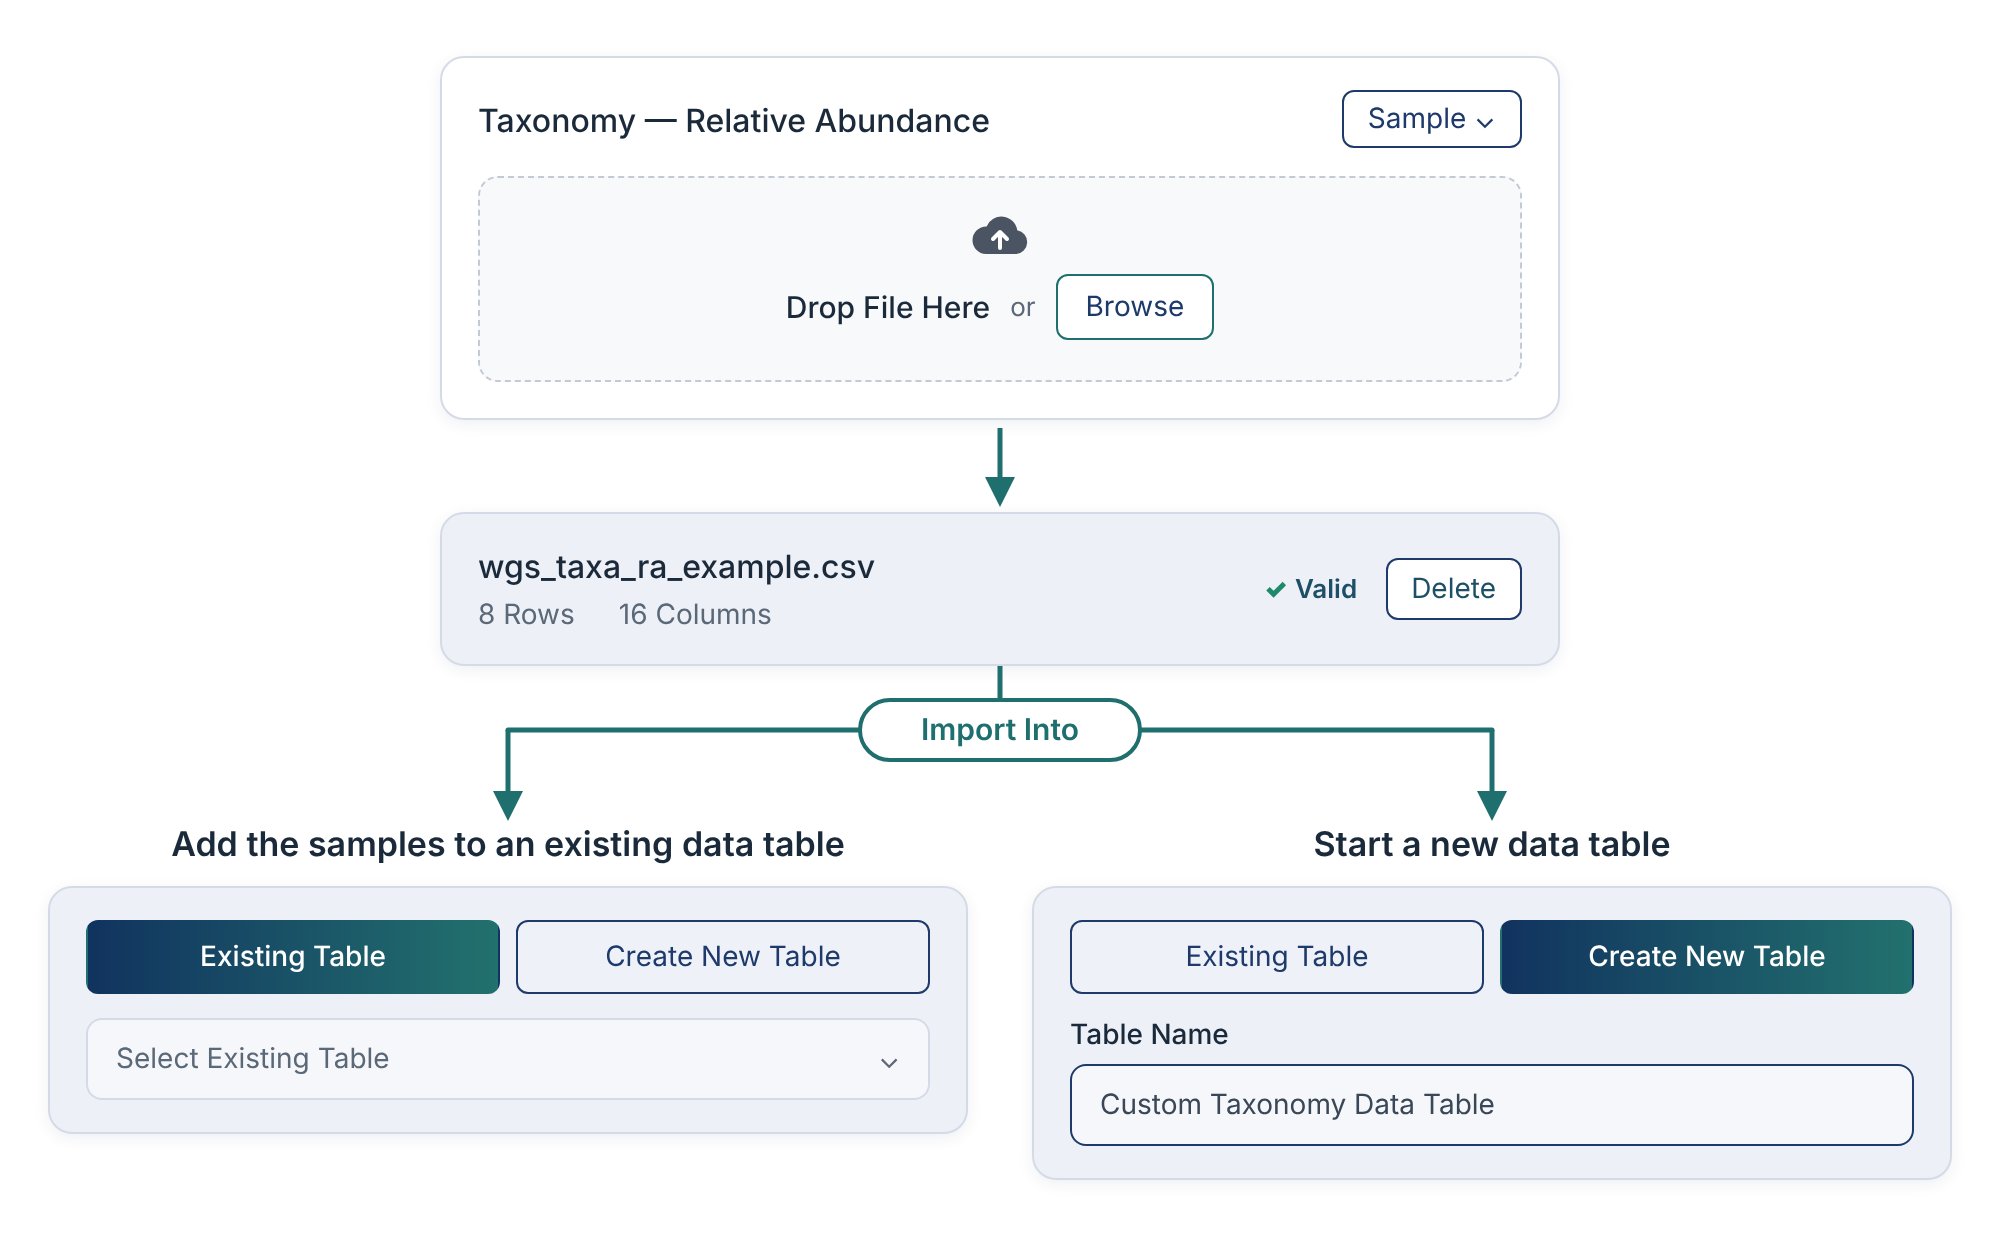
Upload the feature tables that describe the abundance of each feature across your samples.To upload a table:
- Drag the Feature Table file onto Drop File Here in the matching panel, or click Browse and select it.
-
Under Import Into, choose where the data of the file goes. Select Existing Table and pick a table from Select Existing Table to add the samples to a data table already in the study, or select Create New Table and type a name in Table Name.
5
Check the import report
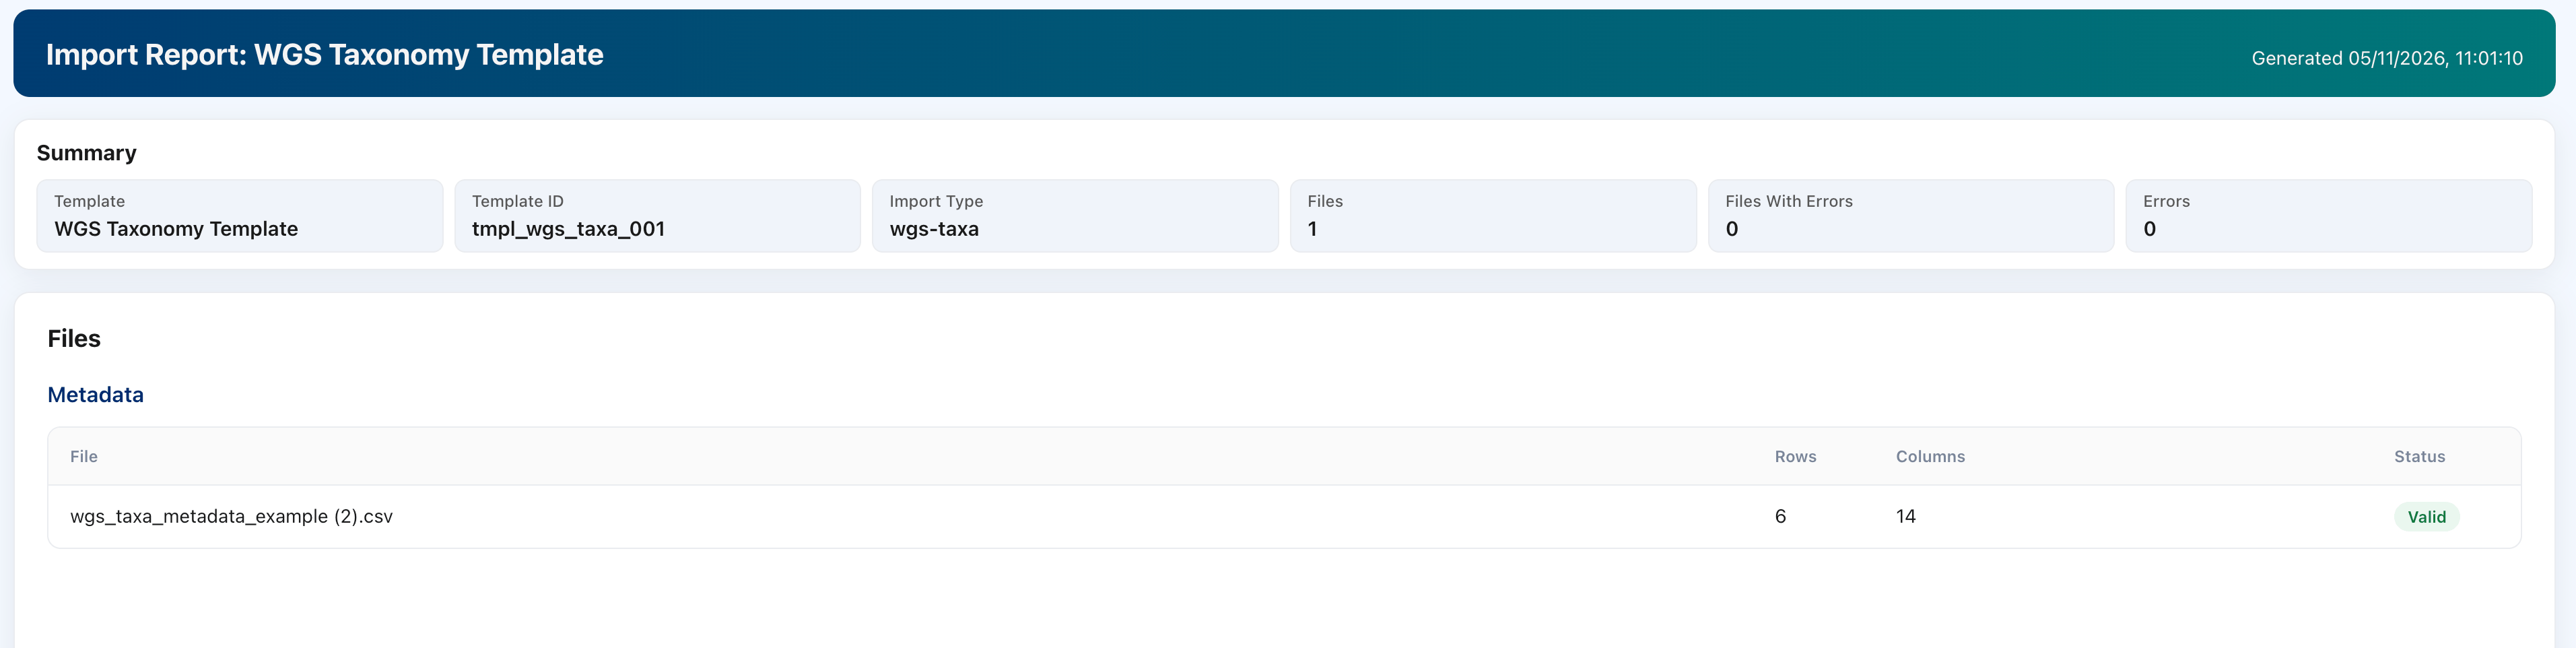
Click Download Import Report, the download icon at the top of the page, to get an HTML summary of the validation of each uploaded file. The report is available as soon as you upload a metadata file.Check the report before you complete the import. Its summary counts the files with errors and the total number of errors, and its file list gives the validation status of each file. If a file has errors, correct it, remove it with Delete and upload the corrected version.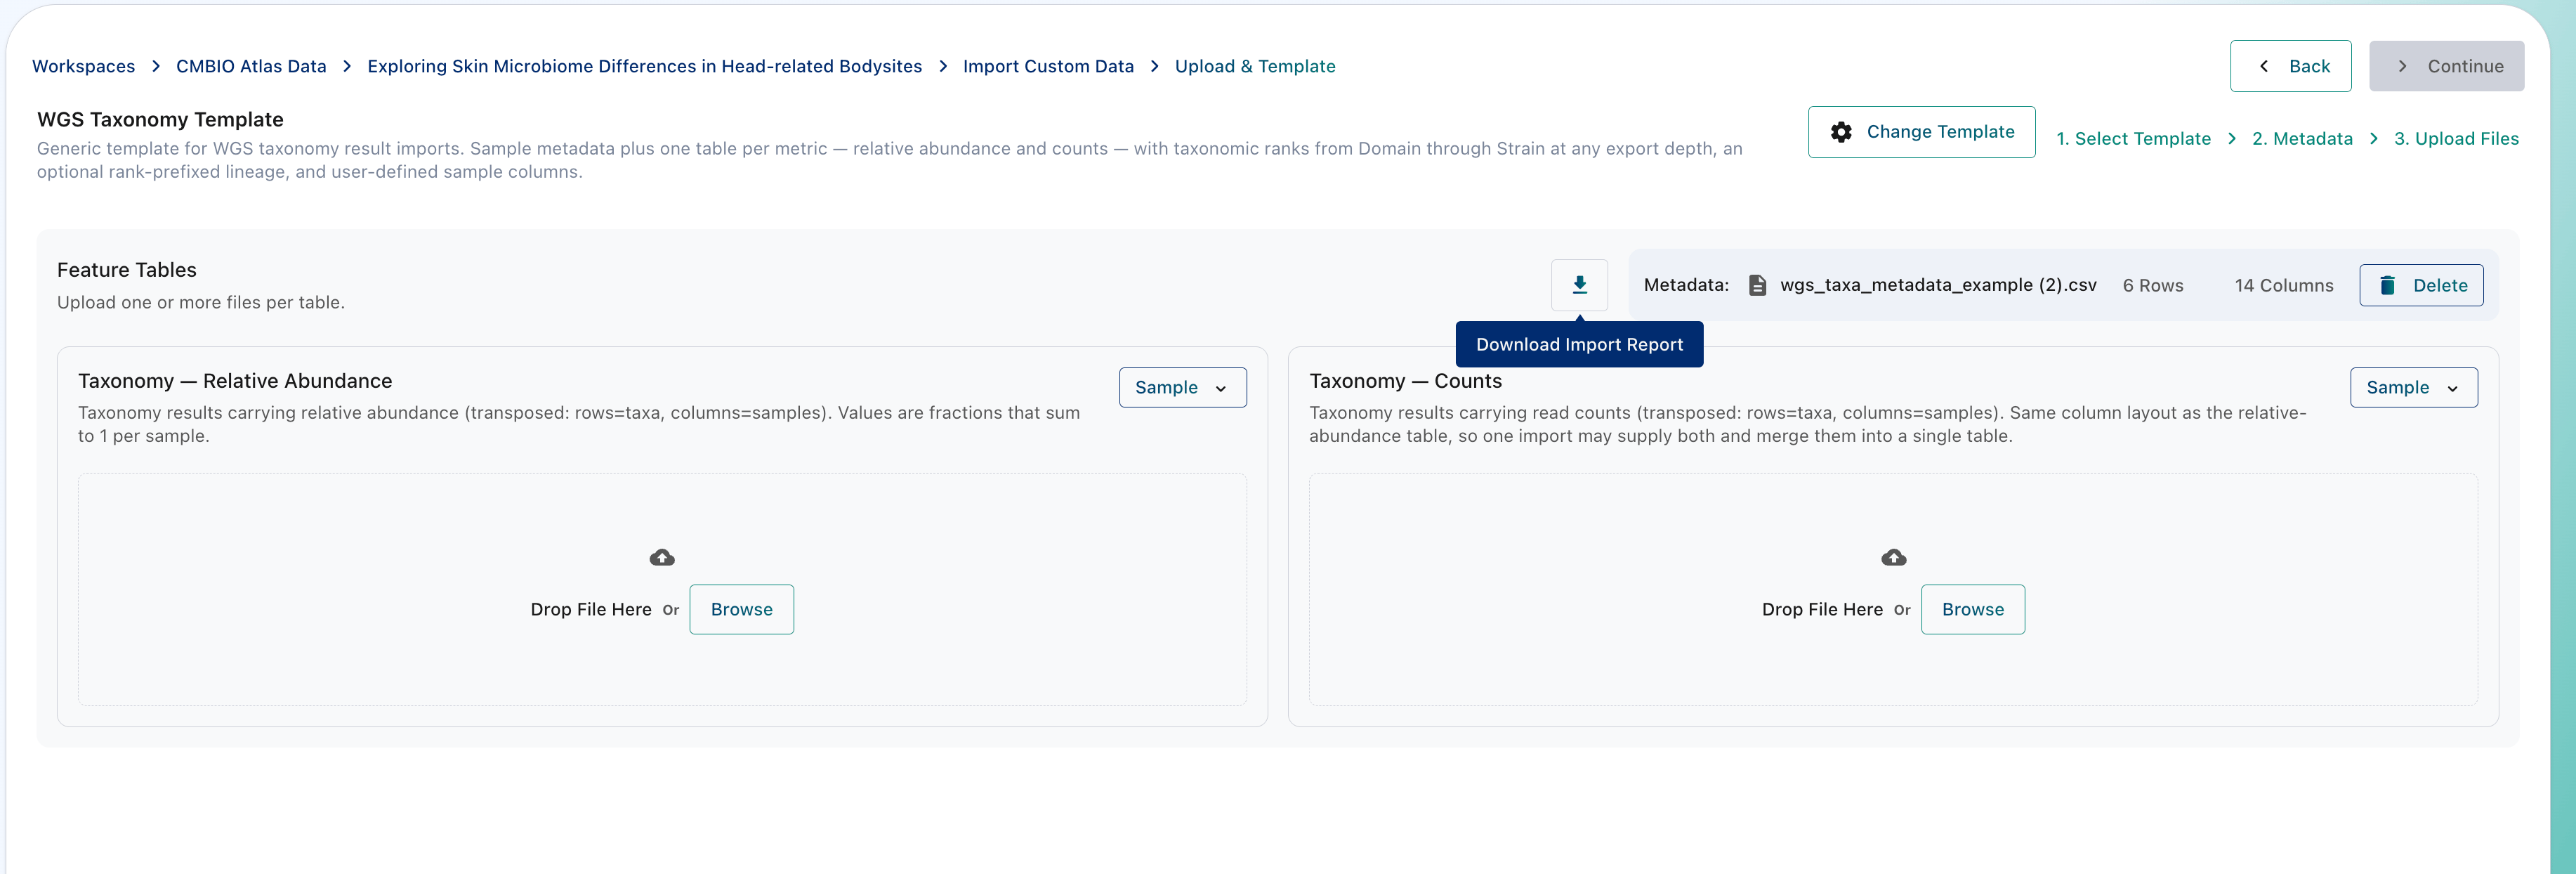
6
Complete the import
Click Continue to import the data. The new data table appears in the Data Tables section of the Study Dashboard, ready for cohort building with the Query Builder. If you added the samples to an existing data table, they will become available when querying data from there.
Next steps
AI Query Builder
Build a cohort from the imported data tables.
Importing data into a study
See the other routes to add data to a study.